Ansicht der sonni Duschkabine 100x100 in einem modernen Badezimmer mit eleganten Fliesen.

Gestalten Sie Ihr Badezimmer mit der sonni Duschkabine 100×100

Einführung in die sonni Duschkabine 100×100

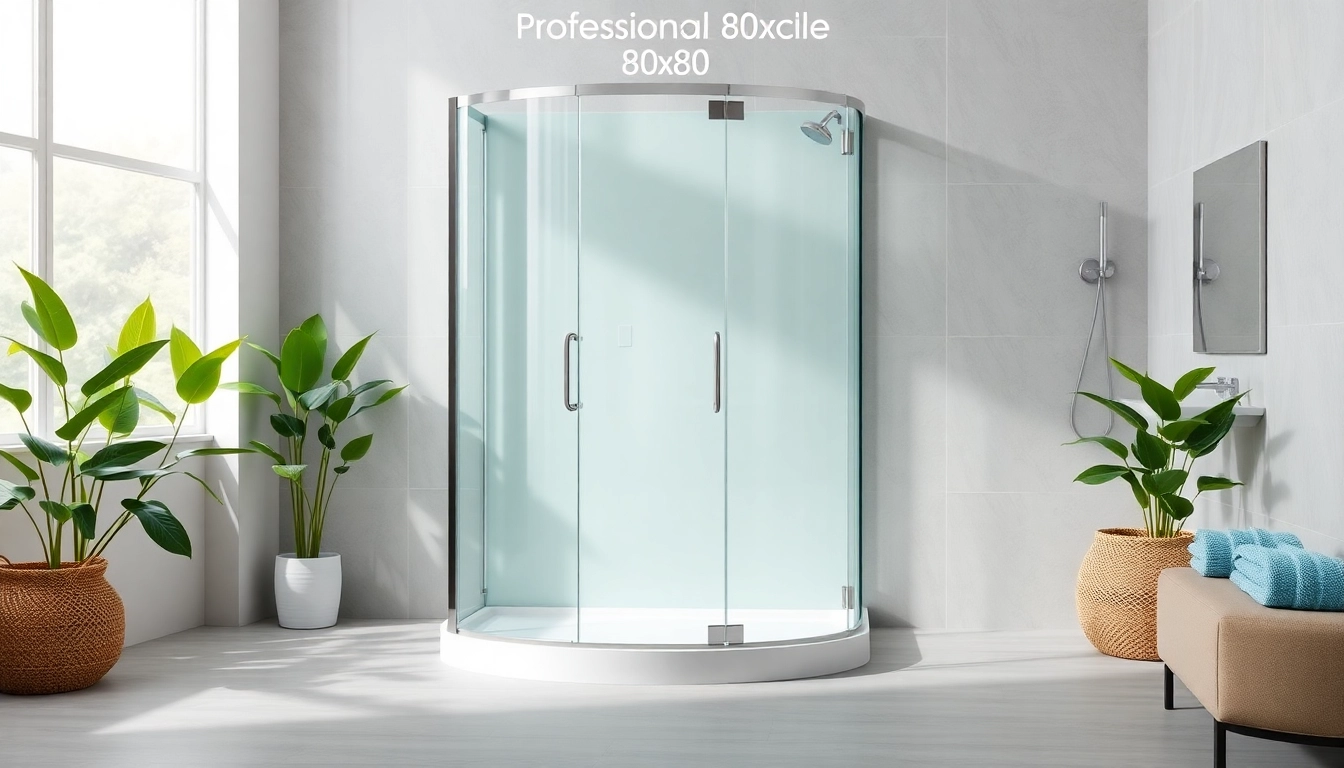
Die sonni Duschkabine 100×100 stellt eine perfekte Lösung für die moderne Badezimmergestaltung dar. Sie kombiniert Funktionalität mit ansprechendem Design und bietet eine maßgeschneiderte Duschoption für kleine bis mittelgroße Badezimmer, ohne Kompromisse bei Stil und Komfort einzugehen.

Was ist eine Duschkabine?

Eine Duschkabine ist eine abgeschlossene Duschfläche, die von Wänden oder einem Rahmen umgeben ist, um Spritzwasser zu kontrollieren und die Privatsphäre zu gewährleisten. Sie bietet eine praktische Alternative zu Badewannen und ermöglicht ein komfortables Duscherlebnis. Die Materialien variieren, wobei Sicherheitsglas und Aluminiumrahmen gängige Wahl sind. Das Design kann von rein funktionalen Ansätzen bis hin zu eleganten, luxuriösen Looks reichen.

Vorteile der sonni Duschkabine 100×100

Die sonni Duschkabine 100×100 bietet zahlreiche Vorteile, darunter:

  • Spaß am Duschen: Durch die großzügigen Maße von 100×100 cm können Sie entspannt duschen, ohne Angst vor Wasserspritzern oder Platzmangel zu haben.
  • Einfache Installation: Die Duschkabine lässt sich mit einer klaren Anleitung leicht montieren, was sie zu einer hervorragenden Wahl für DIY-Enthusiasten macht.
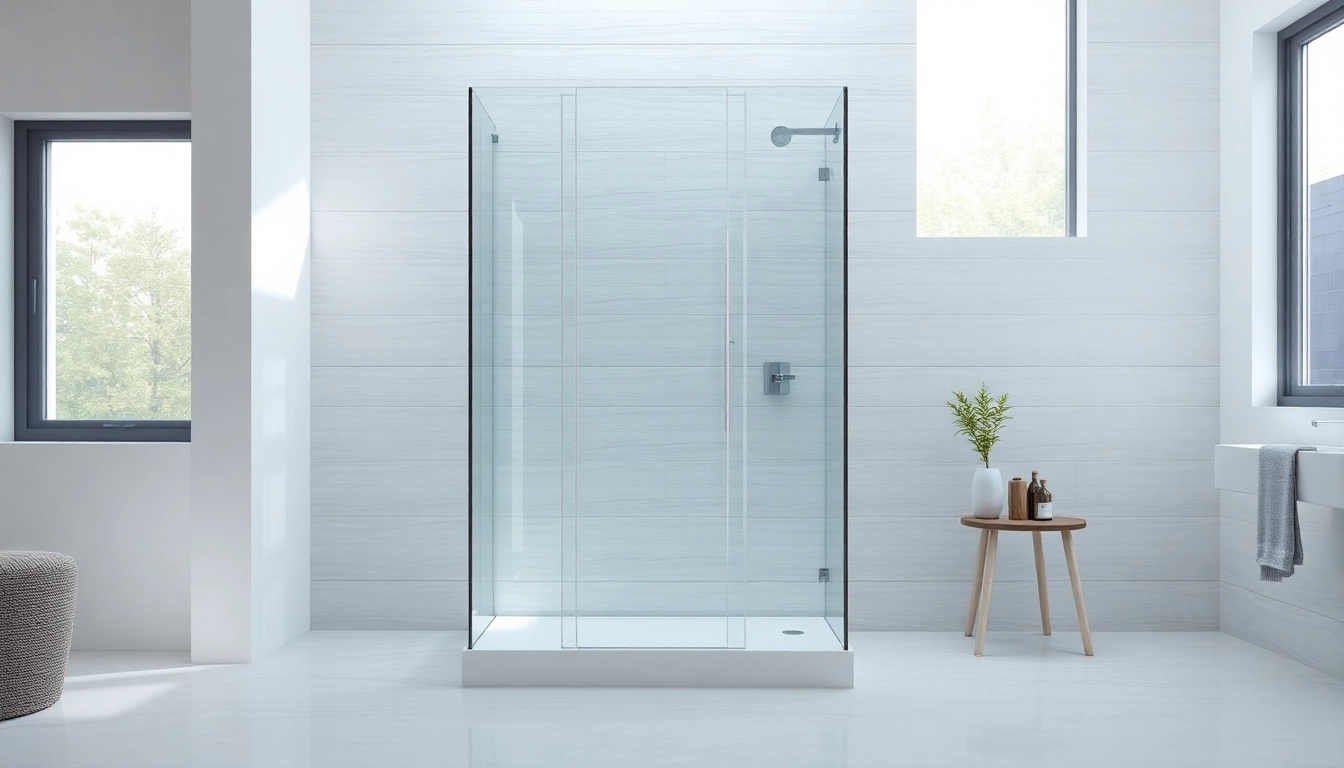
  • Modernes Design: Ihre eleganten Linien und klaren Materialien verleihen Ihrem Badezimmer einen modernen Touch.
  • Leichte Reinigung: Sie ist so konzipiert, dass Schmutz und Wasserablagerungen minimal sind, was die Reinigung erleichtert.

Anwendungsbereiche und Designs

Die sonni Duschkabine 100×100 eignet sich für verschiedene Badezimmerstile, von zeitgenössisch bis klassisch. Sie ist eine ausgezeichnete Wahl für:

  • Kleine Badezimmer: Ihre kompakten Abmessungen machen sie ideal für beengte Räume.
  • Moderne Apartments: Die elegante Gestaltung passt hervorragend zu urbanen Lebensstilen.
  • Familienbäder: Robustheit und Sicherheit sorgen dafür, dass sie auch in Haushalten mit Kindern gut funktioniert.

Planung und Auswahl der richtigen sonni Duschkabine 100×100

Die Planung der Installation einer Duschkabine ist entscheidend für deren langfristige Zufriedenheit. Bei der Auswahl der sonni Duschkabine 100×100 sollten folgende Aspekte berücksichtigt werden:

Raumgröße und Layout berücksichtigen

Die vier Wände Ihres Badezimmers und die Anordnung der Sanitärobjekte sind entscheidend für die Auswahl der richtigen Duschkabine. Messen Sie den verfügbaren Platz genau, um sicherzustellen, dass die sonni Duschkabine 100×100 perfekt hineinpasst und ausreichend Bewegungsfreiheit bietet. Überlegen Sie, wie die Tür geöffnet werden soll – nach außen oder nach innen – da dies den verfügbaren Raum erheblich beeinflussen kann.

Materialien und Designoptionen

Die sonni Duschkabine 100×100 besteht aus hochwertigem klarem Sicherheitsglas, das nicht nur Stabilität bietet, sondern auch elegant aussieht. Der Aluminiumrahmen sorgt für Langlebigkeit und ein modernes Erscheinungsbild. Bei der Auswahl der Duschkabine ist es ratsam, die verfügbaren Oberflächen und Farben des Rahmens zu überprüfen – diese sollten mit den anderen Badezimmerakzenten übereinstimmen.

Barrierefreiheit und Nutzungskomfort

Die sonni Duschkabine 100×100 kann so gestaltet werden, dass sie auch für Menschen mit eingeschränkter Mobilität geeignet ist. Überlegen Sie, ob eine bodenebene Dusche installiert werden kann und ob die Türbreite für einen einfachen Zugang ausreicht. Dies erhöht nicht nur den Komfort für alle Nutzer, sondern auch den Wert Ihres Hauses, da barrierefreie Badezimmer zunehmend gefragt sind.

Installation der sonni Duschkabine 100×100

Die Installation der sonni Duschkabine 100×100 kann auch ohne professionelle Unterstützung erfolgen, wenn Sie die richtigen Schritte befolgen und gut vorbereitet sind.

Schritt-für-Schritt-Anleitung zur Installation

  1. Überprüfen Sie die Verpackung und die Lieferzustände, stellen Sie sicher, dass alle Teile vorhanden sind.
  2. Bereiten Sie den Installationsbereich vor – reinigen Sie den Boden und prüfen Sie die Nivellierung.
  3. Befestigen Sie die Wandprofile an der Wand.
  4. Montieren Sie die Duschkabinenwände passend zu den Profilen.
  5. Installieren Sie die Tür und die Dichtungen.
  6. Überprüfen Sie die Duschkabine auf Dichtheit, um Wasserschäden zu vermeiden.

Tipps zur Vorbereitung des Badezimmers

Bevor Sie mit der Installation beginnen, sind einige Vorbereitungen essenziell:

  • Stellen Sie sicher, dass der Untergrund stabil und eben ist.
  • Überprüfen Sie, ob die Sanitäranschlüsse in der Nähe der Duschkabine liegen.
  • Sammeln Sie das notwendige Werkzeug, wie Bohrmaschine, Wasserwaage und Schraubenzieher.

Häufige Fehler vermeiden

Um Frustrationen während der Installation zu vermeiden, sollten folgende häufige Fehler beachtet werden:

  • Ungenaues Messen der Installationsfläche, was zu Passproblemen führen kann.
  • Unzureichende Abdichtung, die zu Lecks führen kann.
  • Nicht gründliches Überprüfen der Montageschritte, was zu einer fehlerhaften Installation führen kann.

Pflege und Wartung der sonni Duschkabine 100×100

Um die Langlebigkeit und Ästhetik der sonni Duschkabine 100×100 zu erhalten, ist regelmäßige Pflege unerlässlich.

Reinigungstools und -techniken

Verwenden Sie milde Reinigungsmittel und weiche Tücher, um die glatten Flächen zu reinigen. Vermeiden Sie scheuernde oder aggressive Chemikalien, die das Glas zerkratzen könnten.

  • Glasreiniger: Speziell für Duschkabinen entwickelt, sorgt für klare Sicht.
  • Schwämme: Verwenden Sie weiche Schwämme, um Ablagerungen und Seifenreste zu entfernen.
  • Regelmäßige Reinigung: Planen Sie wöchentliche Reinigungen ein, um Ablagerungen zu vermeiden.

Vermeidung von Beschädigungen

Schützen Sie Ihre Duschkabine vor schweren Gegenständen oder scharfen Kanten, die Kratzer verursachen könnten. Achten Sie darauf, dass keine scharfen Duschmatten oder -vorleger verwendet werden, die die Oberfläche beschädigen könnten.

Langfristige Pflege für dauerhafte Schönheit

Um die Schönheit Ihrer sonni Duschkabine 100×100 zu bewahren, sollten Sie langfristige Pflegepraxis einführen:

  • Verwenden Sie eine handelsübliche Duschabzieher nach jedem Gebrauch, um Wasserflecken zu minimieren.
  • Tragen Sie regelmäßig eine glanzgebende Versiegelung auf, um das Glas zu schützen.
  • Überprüfen Sie regelmäßig die Dichtungen und tauschen Sie diese bei Bedarf aus.

Häufige Fragen zur sonni Duschkabine 100×100

Wie groß ist die sonni Duschkabine 100×100?

Die sonni Duschkabine 100×100 hat Maße von 100 cm x 100 cm, ideal für kleinere bis mittlere Badezimmer.

Welche Materialien werden verwendet?

Die sonni Duschkabine 100×100 besteht aus klarem Sicherheitsglas und hochwertigem Aluminiumrahmen für Langlebigkeit.

Wie installiere ich die Duschkabine?

Die Installation erfordert ein wenig DIY-Erfahrung, wird aber mit einer Schritt-für-Schritt-Anleitung erleichtert.

Wie reinige ich die Duschkabine richtig?

Verwenden Sie milde Reinigungsmittel und weiche Tücher, um Kratzer und Ablagerungen zu vermeiden und die Klarheit zu erhalten.

Ist die Duschkabine barrierefrei?

Die sonni Duschkabine 100×100 kann in barrierefreie Badezimmer integriert werden, abhängig von der Installation und den Türdesigns.

duschkabine 80x80 in einem stilvollen Badezimmer mit modernen Glaswänden und minimalistischem Design.

Die perfekte duschkabine 80×80 für Ihr Badezimmer gestalten

Einleitung zur duschkabine 80×80

Die duschkabine 80×80 ist eine beliebte Wahl für viele Badezimmer, da sie eine ideale Größe bietet, um sowohl Funktionalität als auch Stil zu gewährleisten. In diesem Artikel werden wir die verschiedenen Aspekte dieser Duschkabine detailliert beleuchten, von den Vorteilen über das Design bis hin zur Installation und Wartung. Ob Sie Ihr Badezimmer renovieren oder eine neue Duschkabine installieren möchten, hier finden Sie wertvolle Informationen.

Was ist eine duschkabine 80×80?

Die duschkabine 80×80 bezieht sich auf die Abmessungen der Duschkabine, wobei die Kanten jeweils 80 Zentimeter lang sind. Diese Form sorgt für ausreichend Platz für eine komfortable Dusche, während sie gleichzeitig kompakt genug bleibt, um in kleinere Badezimmer zu passen. Oft werden diese Duschkabinen aus hochwertigem Glas oder Acryl hergestellt und können in verschiedenen Stilen und Designs gefunden werden, die sich leicht in jede Badezimmereinrichtung integrieren lassen.

Vorteile der duschkabine 80×80

Eine duschkabine 80×80 bietet zahlreiche Vorteile:

  • Platzersparnis: Ideal für kompakte Badezimmer.
  • Vielseitigkeit: Kann in verschiedenen Stilen, Farben und Materialien gewählt werden.
  • Einfache Reinigung: Die glatten Oberflächen sind leicht zu reinigen.
  • Modernes Design: Verleiht dem Badezimmer eine zeitgemäße Note.

Wichtige Überlegungen vor dem Kauf

Bevor Sie eine duschkabine 80×80 kaufen, sollten Sie einige wichtige Überlegungen anstellen:

  1. Platzangebot: Messen Sie den verfügbaren Platz in Ihrem Badezimmer, um sicherzustellen, dass die Kabine passt.
  2. Einbauart: Überlegen Sie, ob Sie eine ebenerdige Dusche oder eine mit einem Duschbecken wünschen.
  3. Materialwahl: Wählen Sie aus beschichtetem Glas, klarem Glas oder Acryl abhängig von Haltbarkeit und Aussehen.
  4. Design: Berücksichtigen Sie, wie die Duschkabine mit der restlichen Badezimmerausstattung harmoniert.

Designideen für die duschkabine 80×80

Moderne Minimalismus-Ansätze

Der Minimalismus ist ein beliebter Trend in der Badezimmergestaltung. Eine duschkabine 80×80 kann in klaren Linien und neutralen Farben gestaltet werden, um ein schlichteres und elegantes Ambiente zu schaffen. Oftmals wird auch auf überflüssigen Schnickschnack verzichtet, um den Raum nicht zu überladen.

Farb- und Materialkombinationen

Die Farb- und Materialkombinationen für eine duschkabine 80×80 sind schier endlos. Metallische Akzente, wie gebürstetes Nickel, können elegant mit mattem Schwarz oder weißem Glas kombiniert werden. Für ein harmonisches Ambiente ist es ratsam, die Farben der restlichen Badezimmereinrichtung zu berücksichtigen.

Zubehör und Ergänzungen

Zubehör kann eine Duschkabine funktionaler und ansprechender machen. Denken Sie an Haltegriffe, Duschregale oder sogar integrierte Sitzgelegenheiten, die die Nutzung der duschkabine 80×80 angenehmer gestalten. Zudem können spezielle Duschvorhänge oder Dampfduschen hinzugefügt werden, um das Duscherlebnis weiter zu verbessern.

Installation der duschkabine 80×80

Vorbereitung des Badezimmers

Bevor Sie mit der Installation Ihrer duschkabine 80×80 beginnen, sollten Sie das Badezimmer gründlich vorbereiten. Stellen Sie sicher, dass der Untergrund eben und trocken ist. Entfernen Sie vorhandene Armaturen oder Kabinen und prüfen Sie die Wasserleitungen auf eventuelle Lecks.

Schritt-für-Schritt-Anleitung zur Installation

Hier ist eine grundlegende Anleitung zur Installation der duschkabine 80×80:

  1. Montieren Sie die Wände der Duschkabine gemäß der Anleitung des Herstellers.
  2. Installieren Sie die Duschtasse und sorgen Sie dafür, dass diese gut gesichert ist.
  3. Setzen Sie die Glaswände ein und achten Sie darauf, dass alles richtig ausgerichtet ist.
  4. Verkabeln Sie die notwendigen Armaturen und schließen Sie die Wasserleitungen an.
  5. Prüfen Sie auf Undichtigkeiten und nehmen Sie alle notwendigen Anpassungen vor.

Häufige Fehler vermeiden

Bei der Installation können häufig Fehler auftreten, wie das Nichtbeachten der Herstelleranleitungen oder ungenaue Messungen. Vergewissern Sie sich, dass alles gut abgedichtet ist, um Wasserlecks zu vermeiden, und nehmen Sie sich Zeit, um alle Schritte sorgfältig auszuführen.

Wartungstipps für die duschkabine 80×80

Reinigungsmethoden und Produkte

Die Reinigung der duschkabine 80×80 sollte regelmäßig erfolgen, um sie hygienisch und ansprechend zu halten. Verwenden Sie milde Reinigungsmittel, die für die verwendeten Materialien geeignet sind. Essig kann nützlich sein, um Wasserflecken zu entfernen und Glanz zu verleihen.

Pflege der Dichtungen und Armaturen

Dichtungen und Armaturen sind kritische Komponenten einer duschkabine 80×80 und sollten ebenfalls regelmäßig inspiziert werden. Achten Sie auf Anzeichen von Abnutzung oder Beschädigung, um potenzielle Lecks zu verhindern. Handelsübliche Silikondichtungen sollten alle paar Jahre ersetzt werden.

Tipps zur Vermeidung von Schimmel

Schimmelbildung ist ein häufiges Problem in Duschkabinen. Um dies zu vermeiden, stellen Sie sicher, dass die Duschkabine gut belüftet ist, und wischen Sie nach jeder Nutzung das Wasser von den Wänden ab. Regelmäßige Reinigungen mit einem schimmelbekämpfenden Mittel unterstützen ebenfalls die Vorbeugung.

FAQs zur duschkabine 80×80

Wie wähle ich die richtige Größe aus?

Messen Sie den verfügbaren Platz in Ihrem Badezimmer und berücksichtigen Sie die Bewegungsfreiheit.

Welches Material ist am besten?

Glas ist eine beliebte Wahl wegen seines modernen Aussehens und der einfachen Reinigung.

Kann ich die duschkabine selbst installieren?

Ja, mit den richtigen Werkzeugen und Anleitungen ist es möglich, die Installation selbst durchzuführen.

Wie kann ich Schimmel in der duschkabine verhindern?

Regelmäßige Reinigung und gute Belüftung helfen, Schimmelbildung zu vermeiden.

Wie oft sollte ich die duschkabine reinigen?

Es wird empfohlen, die duschkabine 1-2 Mal pro Woche gründlich zu reinigen.

Elegant 800 x 800 shower base showcased in a modern bathroom with calming colors

Elevate Your Space with the 800 x 800 Shower Base: Style and Functionality

Understanding the 800 x 800 Shower Base

What is an 800 x 800 Shower Base?

An 800 x 800 shower base is a square shower enclosure with dimensions measuring 800 millimeters on each side. This size is considered optimal for a variety of bathroom layouts, offering a compact yet spacious solution that caters to both functionality and aesthetic appeal. Whether you are renovating an old bathroom or constructing a new one, the 800 x 800 shower base is a versatile choice that can seamlessly fit into various design themes.

Common Materials Used

The materials used in the production of shower bases play a crucial role in their durability, ease of maintenance, and appearance. Common materials for the 800 x 800 shower base include:

  • Acrylic: Lightweight, easy to clean, and resistant to mold, acrylic is a popular choice among homeowners. It’s available in various colors and styles.
  • Fiberglass: Known for its strength and affordability, fiberglass is a durable option that is often reinforced for added support.
  • Ceramic or Porcelain: These materials provide a classic, elegant look and are resistant to scratches and stains, making them suitable for long-term use.
  • Stone Resin: Offering a luxurious feel, stone resin bases are aesthetic and functional, providing excellent thermal insulation.

Benefits of Choosing 800 x 800

Choosing an 800 x 800 shower base comes with a myriad of benefits:

  • Space Efficiency: The compact dimensions make it ideal for small to medium-sized bathrooms without compromising on comfort.
  • Ease of Access: The square shape allows for easy access from multiple angles, which is particularly beneficial for individuals with mobility challenges.
  • Design Versatility: The neutral size can complement various bathroom styles, from contemporary to traditional, allowing for creative design options.
  • Enhanced Water Drainage: The square shape promotes efficient water flow towards the drain, minimizing the risk of water pooling.

Designing with 800 x 800 Shower Bases

Popular Styles and Trends

When it comes to designing with an 800 x 800 shower base, there are several styles and trends that stand out:

  • Minimalistic Designs: Clean lines and a clutter-free approach are prevalent, utilizing frameless glass doors for a sleek appearance.
  • Industrial Styles: Concrete or stone aesthetics combined with metal fixtures create a modern industrial vibe.
  • Vintage Touches: Featuring classic subway tiles and retro fittings offers timeless elegance that enhances any bathroom.
  • Eco-Friendly Options: Increasingly, homeowners are opting for sustainable materials and water-saving fixtures as part of their design.

Color Palettes that Complement

The color palette you choose can greatly influence the ambiance of your bathroom. Here are some complementary color ideas for pairing with an 800 x 800 shower base:

  • Neutral Shades: White, grey, and beige can create a calming and spacious feel, making the bathroom appear larger and more open.
  • Bold Accents: Dark blues or greens can add drama when paired with lighter colors, creating a modern, chic atmosphere.
  • Earthy Tones: Browns, terracottas, and muted greens promote a natural feel, ideal for spa-like retreats.
  • Pastel Hues: Soft pinks, blues, or yellows can add a playful element, perfect for children’s bathrooms.

Integrating into Various Bathroom Layouts

The versatility of the 800 x 800 shower base makes it easy to integrate into multiple bathroom layouts:

  • Corner Installations: Perfect for optimizing space in smaller bathrooms, placing the shower base in a corner can free up floor area.
  • Standalone Showers: In larger bathrooms, the shower base can be a focal point, surrounded by elegant glass walls.
  • Open Plan Designs: In open concept spaces, the shower can seamlessly blend with other bathing areas, maintaining flow and synergy.
  • Accessible Bathrooms: For those requiring accessibility features, the 800 x 800 shower base can be designed with minimal thresholds for ease of entry.

Installation Tips for an 800 x 800 Shower Base

Preparing Your Bathroom

Before installing your 800 x 800 shower base, preparation is key to ensuring success. Here are the steps to take:

  • Remove existing fixtures and clean the area thoroughly. Ensure the floor is level and free from any debris.
  • Check plumbing to ensure compatibility with the shower base drain positioning.
  • Use a level to confirm that the subfloor is even, and address any issues before proceeding.

Step-by-Step Installation Guide

Installing an 800 x 800 shower base can be broken down into manageable steps:

  1. Set the Base: Place the shower base in position, ensuring it fits snugly without gaps.
  2. Attach Drain Fittings: Connect the drainage system according to the manufacturer’s guidelines, ensuring a proper seal.
  3. Level Adjustment: Use shims as needed to ensure the shower base is perfectly level before securing it in place.
  4. Secure the Base: Once leveled, use the appropriate adhesive or clips to ensure the base is securely anchored.
  5. Finish with Wall Panels: Install wall panels or tiles, ensuring we adhere to the base correctly.

Common Installation Mistakes to Avoid

Even seasoned DIYers can encounter challenges during installation. Here are common pitfalls to avoid:

  • Not checking for level: An unlevel shower base can lead to poor drainage and water pooling.
  • Over-tightening fittings: Secure connections should be firm but not overly tight to prevent cracking or damage.
  • Ignoring drainage angle: Ensure the base has the correct slope towards the drain to facilitate proper water flow.
  • Neglecting waterproofing: Properly waterproofing the surrounding areas is essential to prevent leaks and damage to your bathroom.

Maintenance of Your Shower Base

Cleaning Techniques for Longevity

Maintaining your 800 x 800 shower base is crucial for hygiene and aesthetics. Here are some effective cleaning techniques:

  • Daily Cleaning: Rinse the base with warm water after each use to prevent soap scum buildup.
  • Weekly Deep Cleaning: Use a gentle non-abrasive cleaner suitable for the material of your shower base to scrub and disinfect. Avoid harsh chemicals.
  • Grout Maintenance: Check and clean grout lines regularly to prevent mold and mildew growth.
  • Sealant Reapplication: For materials like stone resin, ensure to regularly reapply sealants as needed to maintain waterproofing properties.

Preventing Common Issues

To prolong the lifespan of your shower base, consider the following preventive measures:

  • Regular inspections: Periodically check for cracks, chips, or loose connections that may require immediate attention.
  • Proper ventilation: Ensure your bathroom is well-ventilated to minimize humidity, preventing mold and mildew growth.
  • Water softening: If you live in an area with hard water, consider installing a water softener to reduce mineral buildup on the shower base.
  • Gentle tools: Always use soft sponges or brushes to avoid scratching the surface of your shower base.

When to Seek Professional Help

While many maintenance tasks can be handled independently, certain issues may require professional intervention:

  • Major repairs: If you notice extensive cracks or leaks, it’s best to consult a plumber or contractor to prevent further damage.
  • Drainage issues: Professional help can be necessary if you encounter persistent drainage problems or clogs.
  • Installation assistance: For those unsure of their DIY skills or facing complications during installation, hiring a professional ensures a flawless result.

Frequently Asked Questions About 800 x 800 Shower Bases

What are the dimensions of an 800 x 800 shower base?

The dimensions of an 800 x 800 shower base are 800 millimeters in length and width, making it a square design.

Can I customize my 800 x 800 shower base?

Yes, many manufacturers offer customization options, including colors, finishes, and additional features based on your needs.

How do I choose the right material?

Consider durability, maintenance, and aesthetic preferences when selecting a material for your 800 x 800 shower base.

What should I consider for installation?

Ensure that the area is level, plumbing aligns correctly, and waterproofing is adequately applied to prevent leaks during installation.

How do I keep my shower base looking new?

Regular cleaning with gentle products, avoiding harsh chemicals, and performing maintenance checks will help keep your shower base in top condition.

Showcase of an elegant led mirror reflecting a stylish bathroom setting.

Enhance Your Space with an Elegant Led Mirror: Luxury Meets Functionality

Understanding the Elegant Led Mirror

What is an Elegant Led Mirror?

An elegant led mirror is a sophisticated blend of functionality and style, equipped with integrated LED lighting. These mirrors not only serve the basic purpose of reflecting one’s image but also enhance the ambiance of a space by providing adjustable, built-in lighting. The illumination is often adjustable, allowing users to select the desired brightness to suit various activities, from applying makeup to relaxing baths. Elegant led mirrors integrate technology and art, merging practicality with aesthetics in home décor.

Benefits of Using an Elegant Led Mirror

Choosing an elegant led mirror offers numerous benefits that go beyond mere reflection. Firstly, they provide optimal lighting, which is essential for personal grooming tasks and ensures accurate color representation for makeup application. Additionally, the energy-efficient LED technology consumes less energy compared to traditional lighting fixtures, consequently reducing electricity bills.

Moreover, elegant led mirrors come in various styles and designs, making them suitable for different interior themes. They can enhance the perceived size of a room through strategic placement, creating the illusion of more space. Finally, the stylish and modern aesthetic these mirrors provide can elevate the overall look of any room, turning an ordinary space into a luxurious one.

How to Choose the Right Elegant Led Mirror

When selecting an elegant led mirror, several factors come into play. Start by considering the dimensions of the space where the mirror will be placed. A large mirror can create a dramatic focal point, while smaller mirrors work well in compact spaces. Next, evaluate the style of your décor. Choose a design that complements the existing furnishings—whether it’s a modern minimalist look or a more intricate vintage style.

Lighting options are also crucial. Look for mirrors with adjustable LED brightness settings to customize lighting to your needs. Additionally, consider your installation options; some mirrors are designed to be mounted on the wall while others may feature a freestanding design. Lastly, think about additional features such as anti-fog technology for bathroom use or built-in Bluetooth speakers to enhance your experience.

Design Styles and Variations

Modern and Minimalist Elegant Led Mirrors

Modern and minimalist elegant led mirrors are characterized by clean lines and a sleek appearance. They often feature geometric shapes and frameless designs that blend seamlessly into contemporary spaces. The focus is on form and function, allowing the mirror to reflect light without overwhelming a room’s aesthetic. A minimalist mirror might incorporate features like dimmable LED lights and touch controls, making them user-friendly.

When styling with modern mirrors, consider their placement. A large minimalist mirror can serve as the centerpiece of a room, drawing the eye and reflecting light to make the space feel larger. Pairing these mirrors with simple, understated accessories adds to their elegance without creating visual clutter.

Classic and Vintage Styles

Classic and vintage elegant led mirrors boast intricate designs that hark back to bygone eras. These mirrors often come with ornate frames, intricate carvings, and antique finishes, providing a sense of history and character. While they may appear traditional, they still incorporate modern technology, allowing for seamless blending of past and present.

These mirrors are ideal for spaces where you want to evoke nostalgia and warmth. They can transform a hallway, living room, or bedroom into a classic sanctuary. When integrating a vintage mirror into your décor, consider surrounding it with complementary antique furniture or décor items that echo its style.

Custom Options for Unique Spaces

Custom elegant led mirrors offer a way to infuse personality into your home. Whether you have an odd-shaped wall or a specific dimension requirement, custom mirrors can be tailored to fit. These mirrors can be designed with unique frames, specific lighting configurations, or even smart technology enhancements, offering unparalleled flexibility.

Additionally, custom options allow homeowners to select materials, colors, and features aligned with their aesthetic preferences. Consider collaborating with a designer or mirror specialist to optimize functionality while ensuring the mirror resonates with your personal style and enhances your space effectively.

Installation and Maintenance

Steps to Install an Elegant Led Mirror

Installing an elegant led mirror involves a few straightforward steps. First, gather the necessary tools, such as a drill, level, wall anchors, and a screwdriver. Start by determining the optimal location on the wall that will not obstruct other elements of the room and ensures adequate lighting from the mirror. Using a level, mark the height where the mirror will be hung.

Next, prepare the wall for installation by drilling holes and inserting wall anchors if necessary. Finally, secure the mirror to the wall according to the manufacturer’s instructions. Ensure that it is securely mounted before allowing it to bear weight. For larger mirrors, consider enlisting professional help to ensure safety and proper installation.

Cleaning Tips for Longevity

Maintaining the clarity and brightness of your elegant led mirror is essential for longevity. Start by using a soft, lint-free cloth to clean the mirror, avoiding rough materials that could scratch the surface. To eliminate streaks, consider using a solution of mild soap and water or a dedicated glass cleaner, avoiding harsh chemicals that can damage the finish and electronics.

Additionally, remember to carefully clean the edges and the back of the mirror where dust can accumulate. Regular cleaning not only keeps the mirror looking pristine but also ensures the LED lights function effectively by preventing dust from obstructing light emission.

Troubleshooting Common Issues

Even the most elegant led mirror can experience issues over time. One common problem is flickering LED lights. This may be caused by a faulty connection or needing a replacement power supply. Check wiring connections and replace components as necessary. If the mirror is fogging up, consider ensuring that it has an anti-fog setting, or invest in a separate anti-fog solution for bathroom mirrors.

Should the mirror stop powering on, verify that it is plugged in properly and check the circuit breaker for blown fuses. If moisture damage is suspected, it may require professional servicing. Regular maintenance can also preemptively address many problems associated with electronic components.

Elegant Led Mirror in Home Decor

Integrating the Reflective Element

Using an elegant led mirror in home decor can significantly enhance the aesthetics and functionality of your space. Reflective surfaces amplify natural light, making rooms feel larger and more open. Positioning mirrors strategically can create a dialogue between various elements in your home, harmonizing colors, textures, and styles.

For instance, placing a mirror opposite a window can enhance brightness throughout a room. This reflective interplay can complement artworks, furniture arrangements, and architectural features, creating an engaging visual experience that draws the eye.

Enhancing Ambiance with Lighting

LED mirrors can play a crucial role in shaping the overall ambiance of a room. The adjustable lighting allows users to influence mood and functionality according to the time of day and purpose. For example, softer lighting can create a relaxing atmosphere for bedtime routines, while brighter settings are perfect for invigorating morning rituals.

Employing an elegant led mirror in conjunction with other lighting elements—such as overhead fixtures and accent lights—can create a sophisticated multi-layered lighting scheme, enhancing the beauty of your space and catering to various needs throughout the day.

Use Cases in Various Rooms

The versatility of an elegant led mirror makes it suitable for numerous rooms within a home. In bathrooms, it serves practical purposes, like aiding in grooming, while simultaneously enhancing the aesthetic. In living rooms, elegant led mirrors can act as statement pieces, adding depth and interest to the decor.

In bedrooms, placing an elegant led mirror can serve as a decorative accent while helping maintain functionality as part of a vanity setup. Additionally, they can be utilized creatively in entryways for a striking focal point, ensuring you make a stylish entrance upon entering the home.

Frequently Asked Questions about Elegant Led Mirrors

What makes an elegant led mirror different from regular mirrors?

While regular mirrors reflect images, elegant led mirrors incorporate built-in LED lighting, enhancing functionality, aesthetic appeal, and overall user experience.

Are elegant led mirrors energy-efficient?

Yes, elegant led mirrors utilize LED technology, which consumes significantly less energy than traditional lighting options, making them an eco-friendly choice.

How can I install my elegant led mirror?

To install your elegant led mirror, gather tools, mark the desired height on the wall, drill holes, and securely mount the mirror following the manufacturer’s instructions.

Can elegant led mirrors be used in bathrooms?

Absolutely! Many elegant led mirrors are designed for bathroom use and feature anti-fog technology and suitable waterproof components.

What maintenance do elegant led mirrors require?

Maintenance includes regular cleaning with a soft cloth and mild cleaner, avoiding harsh chemicals, and troubleshooting issues like flickering lights for longevity.

Hand loofah glove showcasing its texture and fibers in a well-lit bathroom.

Enhancing Your Skincare Routine with a Hand Loofah Glove

The Benefits of Using a Hand Loofah Glove

Exfoliation and Skin Health

One of the core benefits of using a hand loofah glove is its ability to effectively exfoliate the skin. Exfoliation helps in removing dead skin cells that accumulate on the skin’s surface, promoting a smoother texture and encouraging the growth of new skin cells. Regular exfoliation can lead to improved skin tone and reduced appearance of acne, scars, and other blemishes. It is particularly useful in tackling dry patches and flakiness that can plague various skin types. By fostering a routine that incorporates a loofah glove, individuals can enjoy a much healthier complexion.

Increased Blood Circulation

Another advantage of the hand loofah glove is the enhancement of blood circulation. The gentle scrubbing action stimulates blood flow, which can energize the skin and provide it with essential nutrients. Improved circulation aids in the delivery of oxygen and nutrients to skin cells, which can contribute to a healthier glow. Regular use can also alleviate tension and soreness in muscles, making it a wonderful addition to a post-workout shower or a relaxing evening bath.

Relaxation During Bathing

Using a hand loofah glove can transform your regular bathing routine into a soothing ritual. The soft texture of the glove against the skin can create a calming touch, promoting relaxation and reducing stress levels. When combined with warm water and your favorite body wash, the glove offers a sensory experience that invigorates both the mind and body. Engaging in this self-care practice fosters a moment of peace amidst a hectic day, supporting mental well-being alongside physical health.

How to Choose the Right Hand Loofah Glove

Material Options and Their Benefits

Selecting the right material for a hand loofah glove is crucial for ensuring optimal performance and comfort. Common materials include natural fibers like sisal, cotton, and jute, each offering distinct advantages. Sisal, derived from the agave plant, is known for its coarse texture, making it excellent for deep exfoliation. Cotton gloves, on the other hand, provide a softer alternative suitable for delicate skin types. Choosing the right fabric aligns the glove’s functionality with your specific skin needs for the best results.

Size and Fit Considerations

When choosing a hand loofah glove, the size and fit are integral to the user’s comfort and effectiveness of use. A well-fitted glove should enable easy movement and grip, allowing for a thorough yet gentle exfoliation process. Sizes can vary from small to large, and trying several options might be necessary to find the one that feels most comfortable in your hand. Additionally, some gloves come with adjustable straps to enhance grip, ensuring that it stays in place during use.

Eco-Friendliness and Sustainability

As consumers become more conscious about their environmental impact, selecting an eco-friendly hand loofah glove has gained importance. Many options are made from sustainable materials that are biodegradable, thus minimizing their impact on landfills. Brands are now focusing on using natural fibers, organic cotton, or recycled materials that support ethical production practices. By choosing sustainable products, not only do you care for your skin better, but you also contribute to the health of our planet.

How to Properly Use a Hand Loofah Glove

Preparing Your Skin

Preparation is key to achieving the best results from your hand loofah glove. Start with a warm shower or bath to help open your pores and soften your skin. This step enhances the effectiveness of the exfoliation process and reduces the risk of irritation. It is also beneficial to use a gentle, hydrating cleanser to provide lubrication and prevent the glove from pulling at the skin too harshly as you scrub.

Application Techniques for Maximum Effectiveness

To effectively use a hand loofah glove, adopt a gentle yet systematic approach when applying it to your skin. Start with small circular motions or long sweeping strokes, focusing on areas that require more attention, such as elbows, knees, and feet. Avoid using excessive pressure; instead, let the glove do the work for you through its texture. Make sure to move in the direction of the heart for optimal lymphatic drainage. This technique not only exfoliates but also promotes circulation.

Aftercare and Maintenance Tips

After using your hand loofah glove, it’s important to care for both your skin and the glove itself. Rinse off any residual soap and dead skin, then gently pat your skin dry with a towel. Follow up with a nourishing moisturizer to maintain hydration. As for the glove, rinse it thoroughly after every use, washing it with mild soap is advisable weekly to prevent bacteria buildup. Air drying is essential, as this helps it stay hygienic while prolonging its lifespan.

Common Mistakes to Avoid with Hand Loofah Gloves

Using Too Much Pressure

One of the most common errors in using a hand loofah glove is applying excessive pressure during exfoliation. While you may be aiming for a deep clean, over-scrubbing can lead to irritation and micro-tears in the skin. A gentle approach is sufficient for promoting healthy skin without causing harm. Adjust your technique by using light pressure and gradually increasing based on how your skin feels.

Neglecting to Clean the Glove

Failing to clean your hand loofah glove can lead to a build-up of bacteria, mold, and soap residue, compromising its benefits. Regularly washing the glove following its care instructions helps to maintain hygiene and efficacy. Remember to check for any signs of wear or damage; if the glove starts to fray, it may be time for a replacement to avoid skin irritations.

Over-Exfoliating Your Skin

Over-exfoliation can damage the skin barrier, leading to irritation, redness, and increased sensitivity. It is essential to limit the use of your hand loofah glove to 2-3 times a week, depending on your skin type. Listen to your body; if your skin shows signs of distress, consider reducing the frequency or choosing a softer glove that caters to more sensitive skin.

FAQs about Hand Loofah Gloves

What material is best for a hand loofah glove?

Natural fibers like sisal or cotton are preferred for softness and exfoliation, providing the best balance for all skin types.

How often should I use a hand loofah glove?

Using it 2-3 times a week is ideal for maintaining skin health without risking over-exfoliation or irritation.

Can I use a hand loofah glove on sensitive skin?

Yes, individuals with sensitive skin should choose softer materials and apply gently to prevent irritation.

How do I clean my hand loofah glove?

Simplify cleaning by washing it with mild soap and water, rinsing it thoroughly and allowing it to air dry completely.

Are hand loofah gloves reusable?

Yes, hand loofah gloves are designed for repeated use, but regular maintenance is essential to keep them in good condition.