Showcasing lvp waterproof flooring in a stylish living room setup with a cozy vibe.

Enhance Your Home with LVP Waterproof Flooring: Style and Functionality Combined

Introduction to LVP Waterproof Flooring

When it comes to selecting flooring that seamlessly integrates style and practicality, lvp waterproof flooring has surged in popularity among homeowners and designers. Its appealing aesthetics combined with high functionality make it a preferred choice for various applications within the home. This article explores the fundamentals of LVP, its numerous advantages, and how it compares with traditional flooring options.

What is LVP Waterproof Flooring?

LVP, or Luxury Vinyl Plank, is a synthetic flooring material designed to mimic the look of natural wood or stone while providing exceptional durability and water resistance. Composed of multiple layers, LVP features a resilient core layer that protects against moisture, making it an ideal choice for spaces prone to spills and humidity, such as kitchens and bathrooms. Its layering process includes a photo layer to provide high-fidelity visuals, a wear layer for extra durability, and a backing layer that adds comfort and stability.

Benefits of LVP Waterproof Flooring

Choosing LVP waterproof flooring comes with a multitude of benefits. Firstly, its waterproof nature ensures that it withstands spills, making cleanup effortless and preventing the risk of mold and mildew development. Additionally, LVP is relatively easy to install, often requiring minimal tools and expertise compared to materials like hardwood or ceramic tile. The range of styles available allows homeowners to creatively design spaces without compromising on durability. Finally, LVP is also typically more affordable than traditional flooring options, bringing greater value for those on a budget.

How LVP Compares to Traditional Flooring Options

In comparison to traditional flooring options like hardwood, laminate, or tile, LVP stands out in several key areas. While hardwood offers a timeless aesthetic, it often comes with higher costs, susceptibility to warping, and challenging maintenance requirements. Laminate is a more affordable alternative but typically lacks the water-resistant properties of LVP. Meanwhile, tile provides durability and moisture resistance but can be cold underfoot and difficult to install. LVP blends the best aspects of these materials—style, performance, and cost-efficiency—making it a competitive choice in the flooring market.

Choosing the Right LVP Waterproof Flooring

With a plethora of options available, making the right choice in LVP waterproof flooring necessitates careful consideration. Whether you’re seeking a rustic oak look or a modern stone finish, understanding what to look for will guide your decisions.

Factors to Consider When Selecting LVP

  • Texture and Finish: Depending on the desired aesthetic, consider whether you prefer a matte, glossy, or textured finish. Textured options can enhance the authentic feel of wood or stone.
  • Thickness: LVP comes in varying thicknesses. Thicker planks typically offer enhanced durability and sound insulation, making them appropriate for high-traffic areas.
  • Wear Layer: The wear layer is crucial to LVP’s durability. A thicker wear layer generally signifies superior protection against scratches and scuffs.
  • Color and Design: The color palette and pattern should align with your home’s theme. Explore options that balance personal style with potential resale considerations.
  • Installation Method: Select between glue-down, click-lock, or loose lay options based on your skill level and project needs.

Styles and Designs of LVP Waterproof Flooring

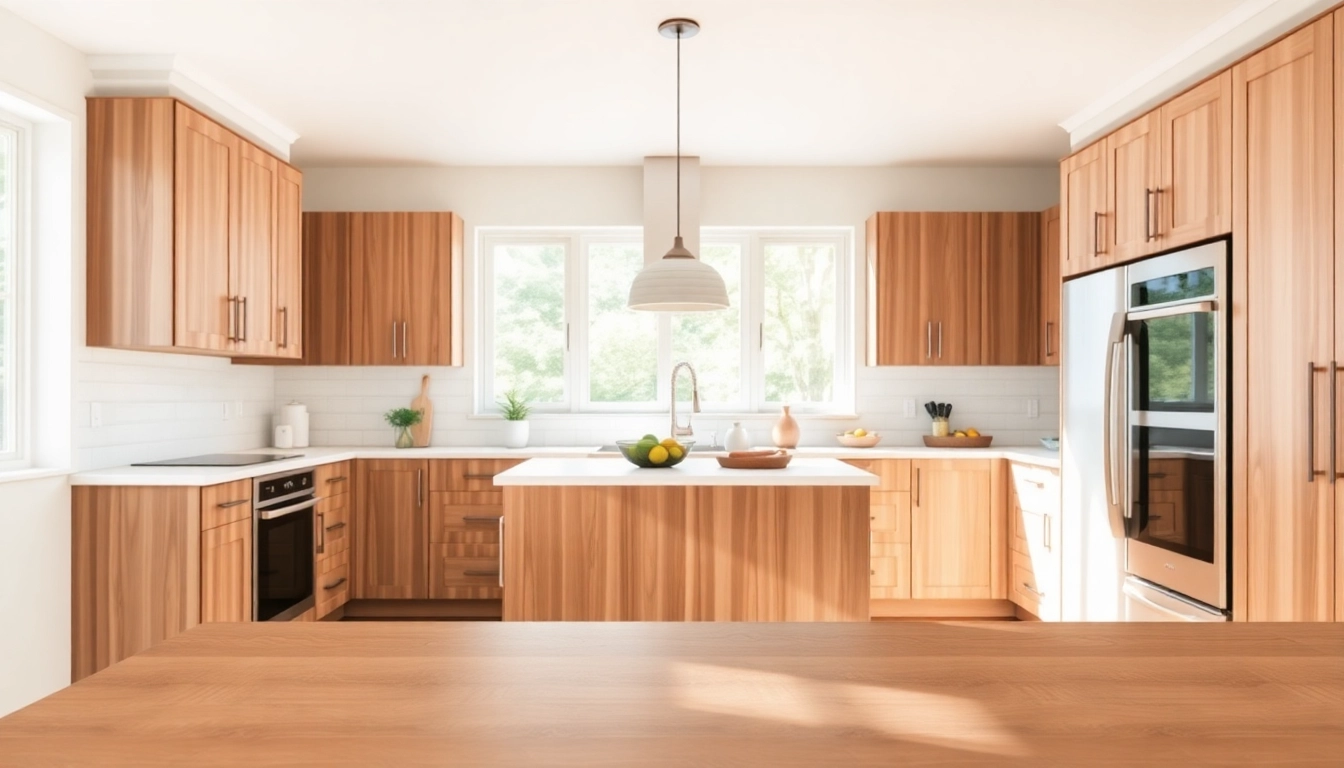
The versatility of LVP means it’s available in a range of styles, including realistic hardwood grains, polished stone effects, and even playful patterns. Popular design trends include gray or whitewashed planks for a contemporary look, while classic oak shades remain timeless. Moreover, advancements in printing technology have led to stunning designs that closely mimic the textures and patterns of natural materials.

Where to Use LVP Waterproof Flooring in Your Home

LVP waterproof flooring can be effectively utilized throughout the home, thanks to its versatility and durability. Ideal locations include:

  • Kitchens: Spills and humidity areas are perfect for LVP, which can endure typical kitchen messes.
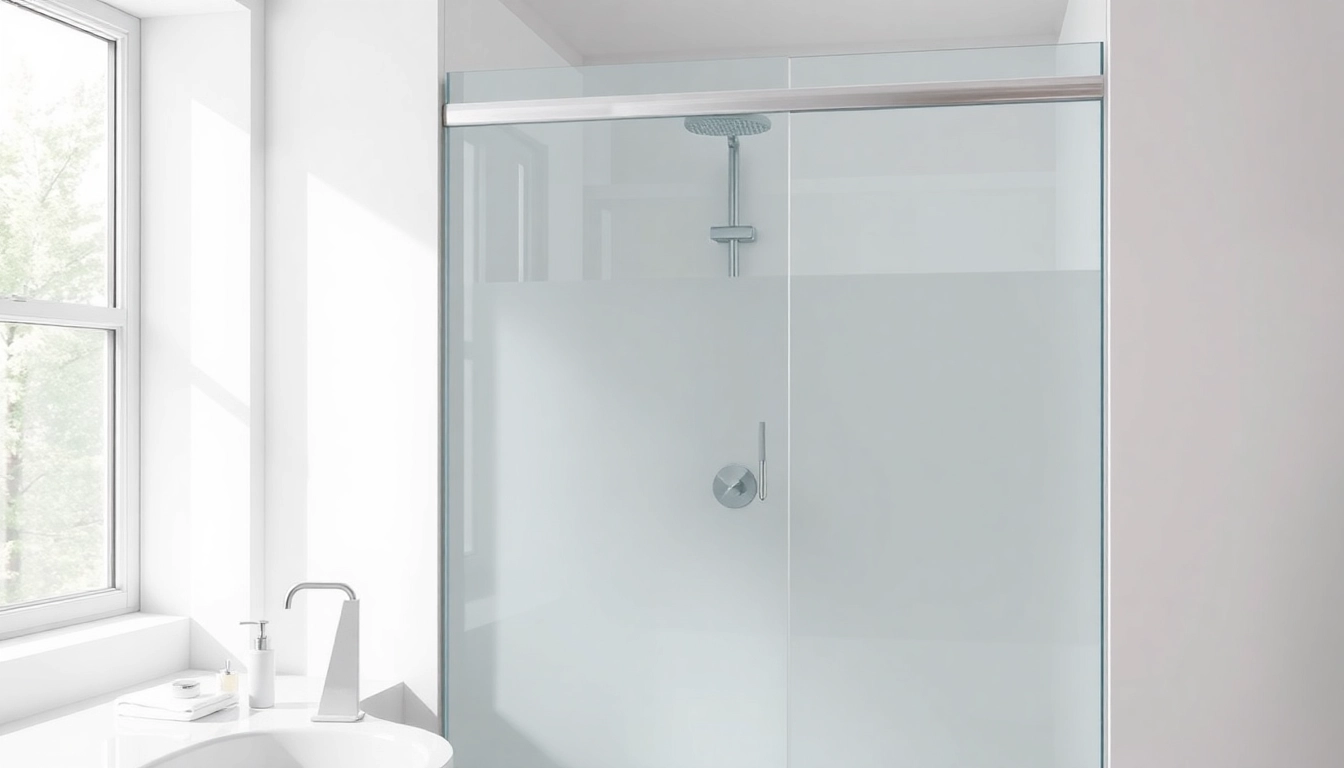
  • Bathrooms: The inherent water resistance makes LVP highly suitable for bathrooms, preventing water damage over time.
  • Living Areas: With numerous attractive designs, LVP pairs beautifully with living room decor.
  • Basements: A great option for basements, where moisture may be a concern.
  • Entryways: The wear-resistance makes it an excellent choice for high foot-traffic areas.

Installation of LVP Waterproof Flooring

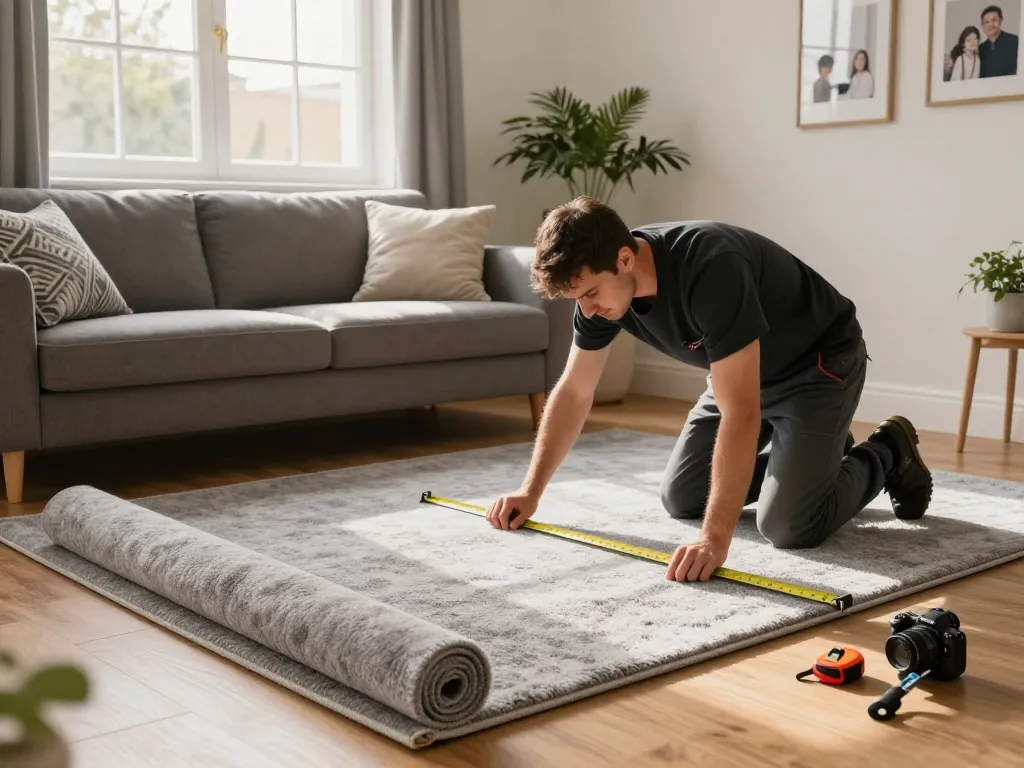
Installing LVP waterproof flooring can be a rewarding project that enhances your living space. Understanding the process ensures a successful installation, whether you choose to undertake it yourself or hire professionals.

DIY Installation Tips for LVP

To achieve a successful DIY installation of LVP, follow these essential steps:

  • Preparation: Ensure the subfloor is clean, dry, and level. Address any imperfections or moisture issues.
  • Acclimation: Allow the LVP planks to acclimate to the room environment for at least 48 hours before installation.
  • Tools Required: Gather necessary tools such as measuring tape, a utility knife, spacers, and a tapping block.
  • Follow Manufacturer Instructions: Each brand may have specific guidelines; adhering to them is vital for warranty coverage.

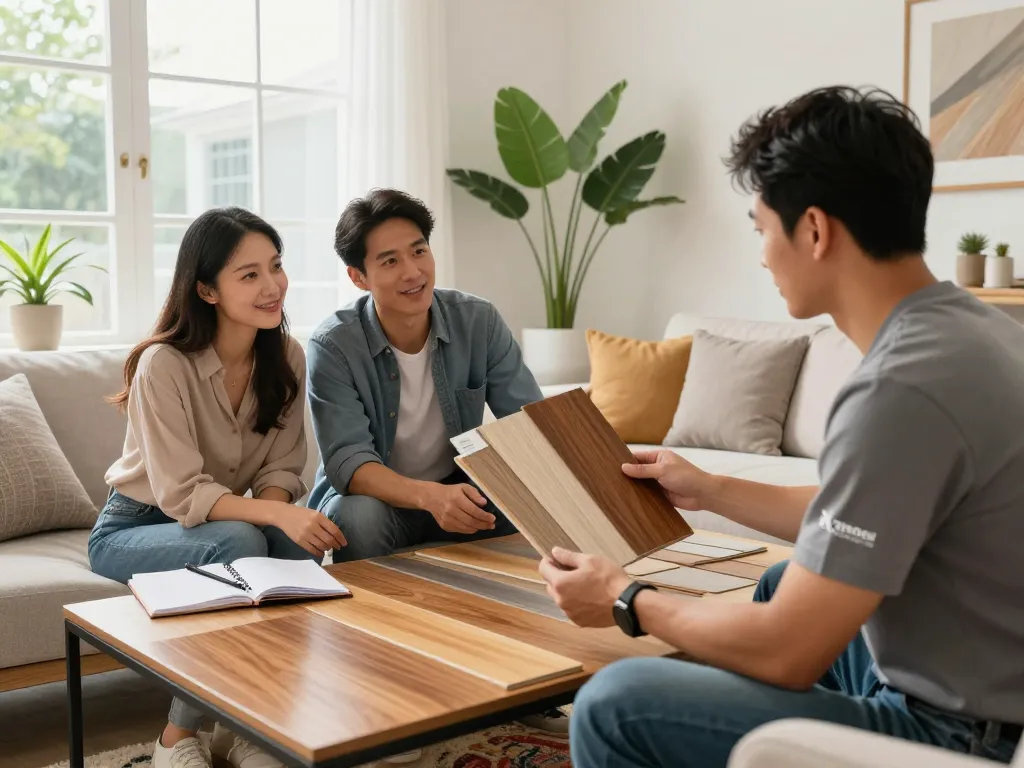
Professional Installation vs. DIY

While DIY installation can save money and provide a sense of accomplishment, opting for professional installation has its merits. Professionals often ensure precision, particularly in challenging layouts or spaces. Moreover, hiring experts usually comes with guarantees regarding the work, adding a layer of protection against potential issues.

Common Mistakes to Avoid During Installation

To steer clear of common pitfalls during installation, consider these points:

  • Neglecting Acclimation: Failing to acclimate the planks can lead to expansion or contraction after installation.
  • Ignoring Subfloor Preparations: Insufficiently preparing the subfloor can lead to long-term issues, including uneven surfaces and premature damage.
  • Incorrect Measurement: Measure twice to prevent waste and ensure a proper fit around corners and doorways.
  • Overlooking Expansion Gaps: Always leave adequate spacing to accommodate thermal expansion.

Maintenance of LVP Waterproof Flooring

Maintaining your LVP waterproof flooring is vital for longevity and appearance. With proper care, LVP can last for many years, providing sustained beauty and functionality.

Cleaning Tips for Longevity

Regular cleaning is key to maintaining LVP flooring. Implement the following practices:

  • Regular Sweeping: Remove dirt and debris with a soft broom or vacuum designed for hard floors.
  • Dynamic Mopping: Use a damp mop with a pH-neutral cleaner designed for vinyl floors; avoid excess water.
  • Immediate Spill Cleanup: Address spills promptly using a soft cloth to prevent staining or moisture damage.

Best Practices for Maintaining Appearance

To preserve the visual appeal of LVP flooring, consider these best practices:

  • Furniture Pads: Use felt pads under furniture legs to prevent scratches and dents.
  • Avoid Harsh Chemicals: Stay clear of abrasive cleaners, which can strip the finish and damage the surface.
  • Regular Inspections: Periodically check for signs of wear or damage to address any issues promptly.

Addressing Common Issues with LVP

As resilient as LVP is, issues may occur. Here are solutions for common problems:

  • Scratches and Scuffs: Minor scratches can often be buffed out with a soft cloth or repaired using a vinyl repair kit.
  • Moisture Issues: If you notice water pooling, investigate the source and remedy it promptly to prevent mold.
  • Loose Planks: Check for gaps after installation; if you find loose planks, consider reapplying adhesive or locking mechanisms.

FAQs About LVP Waterproof Flooring

How Water-Resistant is LVP Waterproof Flooring?

LVP waterproof flooring is designed to be highly water-resistant, effectively preventing damage from spills and moisture. It is suitable for kitchens, bathrooms, and basements, where humidity and spills are common concerns.

What is the Lifespan of LVP Waterproof Flooring?

Typically, LVP waterproof flooring lasts between 10 to 30 years, depending on the quality of the material and maintenance practices. Higher-quality products with thicker wear layers generally offer longer lifespans.

Can LVP Waterproof Flooring Be Repaired?

Yes, LVP flooring can often be repaired. Minor scratches can be buffed, and individual planks can be replaced without needing to re-do the entire floor, making it a sustainaible choice.

Is LVP Safe for Homes with Pets?

LVP is an excellent choice for homes with pets due to its durability and resistance to scratches. It is also easy to clean, making it a convenient option for dealing with pet accidents.

How Do I Choose Between Different LVP Brands?

When selecting among LVP brands, consider factors such as wear layer thickness, warranty coverage, design options, and customer reviews. Choose a brand that demonstrates reliability and quality within your budget.

Install a Mitsubishi mini split ac in a stylish living room highlighting its modern design.

Enhance Comfort with Mitsubishi Mini Split AC: Efficiency Meets Style

Understanding the Mitsubishi Mini Split AC System

What is a Mini Split AC?

A mini split AC system is a powerful yet compact cooling solution, designed to provide efficient temperature control in various spaces. Unlike traditional HVAC systems, mini splits do not require ductwork, making them a flexible option suitable for residential and commercial settings alike. These systems consist of two main components: an indoor unit and an outdoor unit that work together to deliver cooled or heated air. The mitsubishi mini split ac is particularly renowned for its advanced technology and energy efficiency, setting a high standard in the mini split market.

Key Features of Mitsubishi Mini Split AC

The Mitsubishi mini split AC offers a plethora of innovative features that enhance its performance and user convenience:

  • Inverter Technology: This technology allows the compressor to adjust its speed, maintaining a consistent temperature while significantly reducing energy consumption.
  • Quiet Operation: Mitsubishi mini split units are designed to operate quietly, making them ideal for bedrooms, home offices, and other noise-sensitive environments.
  • Multi-Zone Capability: Some models allow for multiple indoor units to be connected to a single outdoor unit, providing personalized climate control in different rooms.
  • Advanced Filtration: Equipped with high-quality filters that remove allergens and pollutants, these systems improve indoor air quality.

Advantages of Mini Split AC Systems

Investing in a mini split AC brings numerous advantages to homeowners and business owners alike:

  • Energy Efficiency: Given their ductless nature and the use of inverter technology, mini split systems consume less energy compared to traditional systems.
  • Flexible Installation: With no need for ductwork, mini splits can be installed in various configurations and tight spaces, allowing for greater flexibility in design and application.
  • Individual Temperature Control: Each indoor unit can be controlled independently, enabling customized climate settings for different rooms.
  • Lower Installation Costs: The absence of ductwork often results in lower installation costs, making it an attractive option for budget-conscious consumers.

Energy Efficiency of Mitsubishi Mini Split AC

SEER Ratings Explained

Seasonal Energy Efficiency Ratio (SEER) ratings are critical indicators of an AC unit’s energy efficiency. It is calculated by dividing the cooling output during the cooling season by the energy consumed in watt-hours. The higher the SEER rating, the more energy-efficient the unit is. Mitsubishi mini split ACs typically boast SEER ratings of 15 or higher, allowing users to benefit significantly from lower energy bills over time. Such efficiency not only reduces operational costs but also minimizes the environmental impact of cooling systems.

How to Lower Energy Bills with Mitsubishi Mini Split AC

Aside from enjoying the inherent energy efficiency of the mitsubishi mini split ac, there are several practical strategies to further lower your energy bills:

  • Thermostat Management: Set the thermostat to a comfortable yet economical temperature, typically around 78-80°F, to optimize energy consumption.
  • Zone Control: Take advantage of the mini split’s multi-zone capabilities by only cooling or heating the areas you’re using.
  • Regular Maintenance: Schedule routine maintenance to ensure the system operates at peak efficiency, including filter cleaning and refrigerant checks.
  • Smart Technology: Consider models with Wi-Fi capabilities that allow you to control your system remotely, ensuring it’s not running unnecessarily when no one is home.

Comparing Energy Efficiency with Traditional Systems

When comparing the energy efficiency of Mitsubishi mini split AC units with traditional central air conditioning systems, the advantages become clear. Traditional systems typically use a SEER rating of around 14, whereas many mini split models exceed 20. This difference means that, especially in regions with prolonged cooling seasons, a mini split can lead to substantial savings in energy bills. Furthermore, since mini splits operate without ductwork, they bypass the energy losses associated with air leaks and poor insulation often found in traditional systems.

Installation Process for Mitsubishi Mini Split AC

Preparing Your Space for Installation

Proper preparation is key to a successful installation of a Mitsubishi mini split AC system. Start by selecting the optimal locations for both the indoor and outdoor units. Factors to consider include:

  • Access to electric power and drainage for condensate.
  • Minimizing the distance between the indoor and outdoor units to reduce potential energy loss.
  • Ensuring unobstructed airflow and appropriate wall space for indoor unit mounting.

Before installation, clear the chosen areas of any furniture or obstructions. Additionally, ensure that walls can support the weight of the units and that there are no structural impediments.

Professional vs. DIY Installation

While some homeowners may be tempted to undertake a DIY installation due to the potentially lower upfront costs, it is essential to consider the complexities involved. Professional installation ensures that the system is installed correctly, maximizing efficiency and performance. Professionals are trained to handle refrigerants safely, follow local codes, and optimize lines and connections. If you opt for a DIY approach, be prepared for the significant challenges, including potential errors that could lead to costly repairs or suboptimal performance.

Common Installation Mistakes to Avoid

To ensure a successful installation, be mindful of the following common mistakes:

  • Inadequate Sizing: Choosing the wrong size unit can lead to inefficient cooling and higher energy bills. Always consult the manufacturer’s guidelines.
  • Poor Indoor Unit Placement: Placing the indoor unit too close to hot surfaces or areas with high foot traffic can hinder performance.
  • Neglecting Electrical Requirements: Always ensure that the electrical system is compatible with the demands of the mini split system.
  • Failing to Test the System: After installation, always test the cooling and heating functions to ensure everything operates correctly.

Maintenance Tips for Mitsubishi Mini Split AC

Regular Cleaning and Care

Routine maintenance is vital for the longevity and efficiency of your Mitsubishi mini split AC. Here are some essential maintenance tips:

  • Filter Cleaning: Clean or replace filters every month during peak usage to maintain optimal airflow and indoor air quality.
  • Coil Cleaning: Clean the evaporator and condenser coils at least once a year to remove dust buildup that can obstruct airflow.
  • Drain Line Maintenance: Regularly check the condensate drain for clogs to prevent water damage and mold growth.

When to Call a Professional for Repair

If you encounter any of the following issues, it’s time to call a professional:

  • The unit does not cool or heat effectively despite regular maintenance.
  • Unusual noises or vibrations coming from the unit.
  • Increased energy bills without an increase in usage.
  • Water leaks around the unit.

Extending the Lifespan of Your Mini Split AC

With proper care, a Mitsubishi mini split AC can last over 15 years. To maximize its lifespan:

  • Schedule annual professional maintenance to identify potential problems early.
  • Ensure that the outdoor unit is free from debris, vegetation, and blockages for proper airflow.
  • Use the unit’s features effectively, such as changing settings based on seasonal needs, to avoid unnecessary wear.

FAQs about Mitsubishi Mini Split AC

What size Mitsubishi mini split ac do I need?

The size you need depends on the room’s square footage. Generally, a good rule is 20 BTU per square foot, but it’s best to consult an expert for accurate calculations.

Can Mitsubishi mini split ac systems heat and cool?

Yes, many Mitsubishi mini split systems are heat pumps that can efficiently provide both heating and cooling, making them versatile year-round.

How often should I service my Mitsubishi mini split ac?

It’s recommended to service your unit at least once a year, ideally before peak usage seasons, to maintain efficiency and performance.

Is installation expensive for a Mitsubishi mini split ac?

Installation costs can vary based on the complexity of the setup and local labor rates. However, many homeowners find it cost-effective in the long run due to energy savings.

How quiet is the Mitsubishi mini split ac?

Mitsubishi mini split units are designed for quiet operation, with models running as low as 19 dB, making them suitable for noise-sensitive environments.

Renovated kitchen with cabinet refacing showcasing modern design, Cabinet Refacing Largo FL services.

Elevate Your Space with Cabinet Refacing Largo FL: A Comprehensive Guide

Understanding Cabinet Refacing Largo FL

What is Cabinet Refacing?

Cabinet refacing is a popular renovation technique that involves updating the exterior of your kitchen cabinets without removing the entire structure. This process typically includes replacing cabinet doors and drawer fronts, applying a new veneer to the cabinet frames, and adding fresh hardware. Homeowners looking for a cost-effective way to refresh their kitchens often consider Cabinet Refacing Largo FL, as it can significantly enhance the aesthetics and functionality of the space.

Benefits of Cabinet Refacing

One of the primary advantages of cabinet refacing is the substantial cost savings compared to a full cabinet replacement. Refacing allows homeowners to achieve a brand-new look for their cabinets at a fraction of the price. Additionally, refacing can be completed in a shorter time frame, minimizing disruption to your home. The process also reduces waste, as existing materials can be reused, aligning with eco-friendly home renovation practices. Enhanced aesthetics, increased property value, and improved kitchen functionality are just a few of the many benefits refacing offers.

Difference Between Refacing and Replacement

Understanding the distinction between cabinet refacing and replacement is crucial when considering kitchen updates. While refacing involves altering the cabinet’s exterior, replacement entails removing the entire cabinetry and installing new units. Refacing might be ideal if your cabinets are structurally sound but visually outdated. On the other hand, replacement could be the preferred option if your cabinets are damaged or no longer functional. Deciding between the two methods often boils down to budgetary constraints, desired aesthetics, and the condition of existing cabinetry.

Choosing the Right Materials

Types of Wood and Finishes

The material choice in cabinet refacing is fundamental to achieving your desired look and durability. Popular materials include solid wood, plywood, and engineered wood, all offering varying degrees of quality and cost. Solid woods like oak or maple provide a natural, timeless aesthetic, while plywood is often more budget-friendly and less prone to warping. Additionally, finishes range from natural stains that showcase wood grain to painted options in bold colors. Selecting the right materials will directly impact the longevity and appeal of your newly refaced cabinets.

Eco-Friendly Options for Refacing

For environmentally conscious homeowners, eco-friendly options are available in cabinet refacing. Many manufacturers offer sustainable materials such as bamboo or reclaimed wood, which not only reduce environmental impact but also add a unique flair to kitchen design. Low-VOC paints and finishes are also crucial for maintaining indoor air quality during and after the renovation. By opting for eco-friendly materials, you can enhance your kitchen while promoting sustainability.

Cost Considerations

One of the most appealing aspects of cabinet refacing is its cost-effectiveness. The total cost can vary significantly based on factors such as the quality of materials selected, the complexity of the project, and labor costs. On average, homeowners can expect to spend between 30% to 50% less than a full cabinet replacement. It’s essential to establish a clear budget and obtain detailed quotes before beginning the project, ensuring all potential costs are accounted for, including unexpected expenses that may arise during the renovation.

Step-by-Step Refacing Process

Preparation: Assessing Your Cabinets

The first step in cabinet refacing is a thorough assessment of your existing cabinetry. Check for structural issues, such as warping or damage, that may warrant replacement rather than refacing. Once you determine that refacing is the best option, you can begin to select materials and layouts. Accurate measurements will also facilitate a smoother installation process, ensuring that your new doors and veneers fit perfectly.

Executing the Refacing

Executing the cabinet refacing process typically involves several key steps. First, the existing hardware (handles, knobs, hinges) should be removed. Next, the cabinet doors and drawer fronts are taken off, followed by the application of a new veneer or laminate to the frames. New doors are then installed, and any additional hardware is attached. It’s crucial to ensure that everything is aligned properly to avoid uneven gaps and to maintain aesthetic appeal. Hiring professionals can simplify this process, given their expertise and equipment.

Final Touches and Maintenance

After the installation is complete, adding the final touches such as decorative hardware or molding can significantly enhance the overall look of your kitchen. Maintenance of refaced cabinets should focus on regular cleaning with non-abrasive materials and avoiding excessive moisture exposure. Proper care will prolong the life of the finishes and keep your cabinet’s appearance fresh.

Design Inspirations for Refaced Cabinets

Popular Styles and Trends

Designing your refaced cabinets opens a realm of possibilities, with many current trends emphasizing simplicity and functionality. Shaker-style cabinets remain a classic choice, featuring flat panels and clean lines that suit both traditional and modern kitchens. Another trend is the use of open shelving to complement refaced cabinetry, allowing for decorative displays while maintaining functionality. Consider your kitchen’s overall theme when deciding on styles to achieve a cohesive design.

Incorporating Color and Hardware

Color selection is pivotal in cabinet refacing, with hues that range from soft pastels to bold, dramatic tones influencing the kitchen’s ambiance. White and gray cabinets continue to be popular choices for their versatility and ability to make spaces feel larger. Additionally, choosing the right hardware can also transform cabinet aesthetics; sleek, modern pulls contrast beautifully with rustic or vintage finishes, creating a personalized kitchen style that resonates with your taste.

Creating a Cohesive Look in Your Kitchen

To achieve a harmonious design in your kitchen, consider how your refaced cabinets work with other elements, including countertops, flooring, and appliances. The idea is to create a unified visual flow throughout the space. Complementary materials and colors will ensure that your kitchen feels intentional and well-designed. Planning for factors such as lighting can also enhance the overall atmosphere and highlight the beauty of refaced cabinetry.

Frequently Asked Questions About Cabinet Refacing

How long does cabinet refacing take?

Typically, cabinet refacing can take anywhere from a few days to a week, depending on the scope of the project and the number of cabinets being updated.

Is cabinet refacing a good investment?

Yes, cabinet refacing is considered a cost-effective way to increase the value of your home, delivering a fresh look at a lower price than complete replacement.

Can I do cabinet refacing myself?

While DIY cabinet refacing is possible, it is often recommended to hire professionals to ensure the best results, especially for complex designs or installations.

What is the cost range for cabinet refacing?

Cabinet refacing costs typically range from $1,500 to $5,000, depending on materials, labor, and the number of cabinets involved in the project.

What are the most popular styles for cabinet refacing?

Some popular styles for refaced cabinets include Shaker, contemporary, and farmhouse, allowing for various aesthetics that can suit any kitchen design.

Admire beautiful cape cod homes in a serene landscape with vibrant flowers and charming architecture.

Enhancing Cape Cod Homes: Tips for Stylish Upgrades and Expansions

Overview of Cape Cod Homes

Cape Cod homes have long held a cherished place in American architecture, primarily characterized by their charm, simplicity, and functionality. Traditionally, these homes are steeped in history, reflecting the maritime heritage and lifestyle of the New England region. As an extension of this legacy, an increasing number of homeowners are seeking to expand and modernize their cape cod homes, ensuring that these structures not only endure but also accommodate contemporary living standards.

Historical Significance

The origins of Cape Cod homes can be traced back to the 17th century when early settlers built simple, practical homes that provided shelter against harsh New England winters. Constructed with steep roofs to shed snow, large chimneys for heating, and a symmetrical façade, these homes were designed with survival in mind. Over time, the architectural style evolved, influencing residential designs across various regions. The historical importance of these homes lies not only in their construction but also in the stories they embody—each house telling a tale of generations who have lived, adapted, and thrived within its walls.

Architectural Features

The architectural features of Cape Cod homes are distinct and recognizable. Key characteristics include:

  • Steep Roofs: The high-pitched roofs are essential for snow and rain runoff.
  • Dormer Windows: These windows provide additional space and natural light in the upper levels.
  • Wooden Siding: Typically painted in pale colors, the wooden siding contributes to the house’s traditional aesthetic.
  • Symmetrical Design: The placement of windows and doors along a central axis creates a harmonious visual appeal.

These features not only contribute to the historical integrity of the homes but also highlight their practical nature.

Modern Adaptations

While retaining traditional elements, modern Cape Cod homes often incorporate contemporary tweaks that address current concerns, such as energy efficiency and open-concept living spaces. Today, homeowners might expand their properties by adding larger windows, enhancing insulation, and integrating sustainable materials, which all reflect a shift towards environmental consciousness. Furthermore, expanded layouts often include multi-functional spaces, promoting both comfort and utility in daily living.

Planning Your Cape Cod Home Expansion

Enhancing your Cape Cod home can be a fulfilling yet complex undertaking. A well-thought-out plan is essential to navigate the intricacies of home expansion while honoring the original structure’s style.

Assessing Your Needs

The first step in any expansion project is to assess your needs. Consider factors such as your family size, lifestyle, and future plans. Do you require additional bedrooms or a larger kitchen? Will you benefit from a dedicated office space for remote work? Identifying your primary requirements will help guide your expansion and ensure that the final design enhances your living experience.

Permitting and Regulations

Before any physical work begins, it’s crucial to understand the local permitting and regulations. Zoning laws may dictate the types of expansions allowed, particularly in historic areas where maintaining architectural integrity is important. Consult your local building department to learn about the necessary permits and regulations, as well as any inspections required during the process.

Budgeting for Your Project

Creating a realistic budget is one of the most critical aspects of home expansion. Include estimates for materials, labor, and any unexpected costs that might arise. Additionally, consider engaging a professional architect who specializes in Cape Cod aesthetics, as they can provide guidance on maintaining the structural integrity and historical charm of your home while meeting modern standards. By carefully planning your budget, you can avoid financial pitfalls and ensure a smoother expansion process.

Interior Design Ideas for Cape Cod Homes

The interior of Cape Cod homes often reflects a blend of simplicity and elegance, capturing the essence of seaside living. When planning your interior design, consider these transformative ideas.

Color Palettes and Finishes

Soft, muted colors are a hallmark of Cape Cod interior design. Consider hues like pale blues, sandy beiges, and creams that echo the coastal landscape. These colors create a serene environment that enhances natural light, helping spaces feel open and inviting. Complementing these palettes with natural finishes—such as weathered wood or stone—can further enhance the seaside aesthetic.

Maximizing Natural Light

cape cod homes are often designed to incorporate abundant natural light, which can dramatically affect mood and perception of space. Consider using large windows, skylights, and glass doors, allowing for seamless indoor-outdoor living. This approach not only brightens your home but also connects it more closely with the surrounding landscape.

Functional Spaces for Families

Modern families benefit from multi-functional spaces that adapt to various needs. Creating an open-concept design in social areas—such as combining the kitchen, dining, and living spaces—can foster interaction and ease of movement. Additionally, incorporate custom-built furniture solutions that maximize storage while keeping floor space open. Designing for functionality will ensure your Cape Cod home remains a practical family haven.

Landscaping Around Cape Cod Homes

Thoughtful landscaping enhances the overall aesthetic of Cape Cod homes while also improving curb appeal. A beautiful exterior sets the tone for what lies within.

Choosing Native Plants

Utilizing native plants is not only environmentally responsible but also enhances the natural aesthetics of your landscape. Species such as beach roses, hydrangeas, and salt-tolerant grasses thrive in local conditions and require less maintenance. By choosing plants that are well-adapted to the regional climate, you can create a thriving garden that minimizes water and chemical usage.

Creating Outdoor Living Spaces

Outdoor living areas are a fantastic way to extend your home’s functionality. Consider constructing patios, decks, or outdoor kitchens that offer spaces for entertaining and relaxing. These areas can be designed using materials that complement the architectural style of your Cape Cod home, providing continuity between indoor and outdoor spaces.

Seasonal Maintenance Tips

Maintaining the landscape around your Cape Cod home is crucial for ensuring it remains vibrant and welcoming. Regularly check and prune shrubs and trees, and ensure that your garden beds are well-aerated and nourished. Additionally, seasonal tasks such as mulching, fertilizing, and cleaning hardscapes are essential in keeping your outdoor environment looking its best throughout the year.

Frequently Asked Questions

What defines a Cape Cod home?

A Cape Cod home is characterized by its steep roof, dormer windows, and symmetrical design, often featuring wooden siding.

Can I expand my Cape Cod home?

Yes, expansions are common, but ensure compliance with local zoning regulations and architectural styles to maintain charm.

What colors are best for Cape Cod homes?

Soft whites, blues, and earthy tones complement the traditional Cape Cod style while enhancing curb appeal.

How can I improve energy efficiency?

Upgrading insulation, windows, and utilizing energy-efficient appliances can significantly improve your home’s efficiency.

What landscaping works best with Cape Cod homes?

Native plants, flowering shrubs, and well-defined walkways enhance the natural beauty of Cape Cod homes.

Paver patio near me, showcasing elegant family gathering on a cozy outdoor patio with fire pit and beautiful landscaping.

Paver Patio Near Me: Innovative Designs for Your Dream Outdoor Space in 2026

Understanding Paver Patios

Paver patios are rapidly gaining popularity among homeowners who want to enhance their outdoor living spaces. These patios offer not just functionality, but a considerable aesthetic appeal that can transform any yard into a luxurious retreat. When exploring options, Paver patio near me provides comprehensive insights into local services that can cater to your specific needs and preferences.

What is a Paver Patio?

A paver patio consists of an outdoor area paved with individual units made of various materials, including concrete, brick, or stone. Unlike a solid concrete slab, these units allow for greater design flexibility and can be arranged in countless patterns and colors to complement your home’s architecture.

Benefits of Installing a Paver Patio

  • Durability: Pavers are designed to withstand the elements, ensuring that your patio lasts for years.
  • Low Maintenance: They require minimal upkeep; regular cleaning and resealing can keep them looking new.
  • Aesthetic Appeal: Available in various colors, shapes, and textures, pavers add a distinctive look to your outdoor space.
  • Versatility: Paver patios can blend seamlessly with other outdoor features like walkways and gardens.
  • Increased Property Value: A well-designed patio can significantly boost your home’s market value.

Common Materials for Paver Patios

The choice of materials significantly influences the appearance and functionality of your paver patio. Common options include:

  • Concrete Pavers: Known for their durability, these pavers come in various styles and colors.
  • Brick Pavers: These provide a classic look and are ideal for traditional homes.
  • Natural Stone Pavers: Offer a unique, organic feel, but can be more expensive.
  • Permeable Pavers: These allow water to pass through, reducing runoff and promoting drainage.

Choosing the Right Location

Selecting the ideal location for your paver patio is crucial to its functionality and visual appeal. Several factors should be considered when choosing a site:

Factors to Consider When Selecting a Site

  • Proximity to the House: Ideally, your patio should be easily accessible from your home.
  • Size and Shape of Your Yard: The patio should complement the overall layout of your landscaping.
  • Purpose of the Patio: Consider whether the patio will be used for entertaining, family gatherings, or solitude.

How Sunlight Affects Your Patio Design

Sunlight plays an essential role in patio design. Areas with ample sunlight can be great for social gatherings, while shaded spots may be preferred for relaxation during hotter seasons. Assess your yard’s sunlight patterns throughout the day to maximize your patio’s usability.

Understanding Drainage and Soil Conditions

Proper drainage is essential to prevent water from pooling on your paver patio. Before installation, evaluate your yard’s soil conditions and consider hiring a professional to ensure that your new patio will have the right pitch for drainage.

Designing Your Perfect Paver Patio

Designing a paver patio involves more than just deciding its shape and color. Consider incorporating various features that enhance both functionality and aesthetics.

Trending Paver Patterns and Layouts

  • Herringbone: This intricate pattern adds visual interest and is highly durable.
  • Basketweave: A classic look that works well in traditional patios.
  • Random Patterns: Perfect for those who want a unique, custom feel.

Incorporating Functional Features (e.g., fire pits, seating walls)

Functional features can enhance your patio’s usability. Consider adding:

  • Fire Pits: These are perfect for evening gatherings and provide warmth during cooler months.
  • Seating Walls: To maximize space and provide additional seating without the need for patio furniture.
  • Built-In Planters: These can add greenery and vibrancy to your patio.

Bringing Color and Texture into Your Design

Colors can evoke different moods; warmer tones like reds and yellows create an inviting atmosphere, while cooler tones like blues and grays can be more serene. Mixing different textures can also create a dynamic visual contrast, enhancing your patio’s overall appeal.

Installation Process for Paver Patios

Understanding the installation process is vital to achieving a successful outcome for your paver patio. Here’s a brief overview of what to expect:

Preparing the Ground for Installation

The ground must be properly prepped before installation. This typically involves clearing the area of any debris, ensuring the site is level, and, if necessary, compacting the soil to create a solid foundation.

Step-by-Step Installation Guide

  1. Lay Base Material: A layer of gravel is typically added to support the pavers.
  2. Set Pavers: Begin laying your chosen pavers according to your design pattern.
  3. Fill Joints: Once all pavers are laid, fill the gaps with jointing sand to stabilize them.
  4. Compact the Surface: Use a plate compactor to secure the pavers in place and enhance stability.

Common Mistakes to Avoid During Installation

Even experienced DIYers can make mistakes. Here are some common pitfalls to avoid:

  • Inadequate site preparation can lead to uneven surfaces.
  • Choosing the wrong type of paver material for your climate can shorten the lifespan of your patio.
  • Neglecting proper drainage solutions may result in water pooling and damage.

Maintaining Your Paver Patio

A well-maintained paver patio can provide enjoyment for years. Follow these guidelines for upkeep:

Simple Cleaning and Maintenance Tips

  • Regular Sweeping: Keep debris off your patio to prevent staining.
  • Pressure Washing: This can help remove stubborn stains and maintain paver appearance.
  • Resealing: Depending on the material, resealing may be required every few years.

How to Restore and Repair Paver Surfaces

Over time, even the best patios may require repairs. Common issues include:

  • Cracked Pavers: Replace any cracked pavers to maintain a cohesive look.
  • Weed Growth: Use weed killers or hand-pulling methods to manage unwanted plants.
  • Unevenness: Adjust the base or re-level pavers as necessary.

Future Trends in Paver Patio Maintenance

As technology evolves, so do maintenance practices. Innovative cleaning solutions and eco-friendly sealers are becoming more popular, making it easier for homeowners to maintain their patios while caring for the environment.

What Are the Costs Associated with a Paver Patio?

The costs of installing a paver patio can vary widely depending on size, materials, and labor. On average, homeowners might expect to pay anywhere from $12,000 to $16,000 for a mid-sized patio. This price can fluctuate based on the complexity of the design and the type of pavers chosen.

Are Paver Patios Worth the Investment?

Investing in a paver patio often pays off in increased property value and enhanced quality of life. The versatility and durability of pavers make them a long-term solution for outdoor living spaces, making them well worth the investment.

How Long Do Paver Patios Last?

With proper installation and maintenance, paver patios can last anywhere from 20 to 50 years. This longevity, alongside their aesthetic appeal, makes them a preferred choice for homeowners looking to enhance their outdoor spaces.

Top 10 Essential Tips for a Beautiful Home and Garden

Understanding Home and Garden Basics

Creating a beautiful and functional home and garden space goes beyond aesthetics; it encompasses understanding the underlying principles that guide design and maintenance. This section will delve into the importance of thoughtful home and garden design, essential terminology, and how to assess your space effectively.

The Importance of Home and Garden Design

Home and garden design plays a crucial role in enhancing the quality of life for the inhabitants. A well-designed space is not merely about visual appeal; it impacts functionality, comfort, and even mental well-being. For example, studies have shown that individuals who spend time in well-planned gardens report lower stress levels and increased feelings of happiness.

Moreover, effective design can significantly increase property value. According to the National Association of Realtors, landscaping can yield a return on investment of up to 100%. A thoughtfully designed garden can create an inviting atmosphere that attracts potential buyers, making it a vital consideration for homeowners.

Common Home and Garden Terminology

Understanding the language of home and garden can empower homeowners to make informed decisions and communicate effectively with professionals. Here are some common terms to know:

  • Hardscaping: Refers to the non-plant elements of landscaping, such as patios, pathways, and retaining walls.
  • Softscaping: Encompasses all the living elements of landscaping, including plants, trees, and soil.
  • Perennials: Plants that live for more than two years, providing garden beauty and stability over time.
  • Annuals: Plants that complete their life cycle in one growing season, often used for seasonal color.

Assessing Your Space: Size, Layout, and Functionality

Before embarking on any home or garden project, assessing your space is essential. Start by measuring the square footage of your home and garden area. Consider the layout and how different zones can be utilized effectively. For example, if you have a small backyard, think about vertical gardening or container gardening to optimize your space.

Additionally, functionality should guide your design choices. Ask yourself:

  • What activities will take place in this space?
  • How can I maximize natural light and airflow?
  • What are the existing features that can be enhanced or incorporated?

Utilizing tools like garden planners and design software can also aid in visualizing your project before execution.

Essential Gardening Techniques for Beginners

For those new to gardening, starting can be daunting. However, with some foundational knowledge, anyone can cultivate a thriving garden. This section covers crucial gardening techniques that every beginner should master.

Selecting the Right Plants for Your Climate

Choosing plants suited to your climate is fundamental for gardening success. Each plant has specific growing conditions, including temperature, sunlight, and moisture requirements. Start by identifying your USDA Plant Hardiness Zone, which indicates the types of plants that will thrive in your area.

For instance, if you live in a warmer zone (like zone 9), you might opt for heat-tolerant plants such as succulents or tropical flowers. Conversely, in cooler zones (like zone 4), hardy perennials like daylilies or hostas would be more appropriate. Local extension services or garden centers can provide valuable insights into suitable plants for your region.

Soil Preparation and Fertilization Basics

Healthy soil is the foundation of any successful garden. Begin by testing your soil to understand its pH and nutrient levels. You can purchase a soil testing kit or send a sample to a local extension service. Based on the results, you may need to amend your soil with organic matter, such as compost or well-rotted manure, to improve fertility and drainage.

Fertilization is also key. Consider using slow-release fertilizers that provide nutrients over time, or organic options like bone meal for phosphorus, which supports root development. A general rule of thumb is to fertilize your plants at the beginning of the growing season and again mid-season for optimal growth.

Watering Techniques: Timing and Methods

Watering is often overlooked but is crucial for plant health. The best time to water is early in the morning or late in the evening when temperatures are cooler, minimizing evaporation. Aim for deep watering rather than frequent shallow watering to encourage deep root growth.

Consider using various watering methods:

  • Drip irrigation: Efficiently delivers water directly to the plant roots.
  • Soaker hoses: Allow water to seep through porous materials, ideal for garden beds.
  • Hand watering: Provides control and is often necessary for container plants.

Monitor the soil moisture level to determine when to water. A simple test is to stick your finger into the soil; if it feels dry an inch down, it’s time to water.

Home Improvement Projects to Enhance Value

Improving your home not only enhances your living experience but can also significantly increase property value. This section will explore high-impact home improvement projects that provide the best returns on investment.

Identifying High-Impact Areas for Renovation

When considering home renovations, focus on areas that potential buyers value the most. According to Remodeling Magazine’s Cost vs. Value report, kitchen and bathroom remodels typically yield the highest returns. Simple updates, such as new fixtures, countertops, or cabinetry, can make a substantial difference without breaking the bank.

Additionally, curb appeal is critical. Investing in landscaping, exterior painting, or new siding can enhance first impressions and drive interest in your home. For example, a homeowner who invested $5,000 in landscaping improvements saw an increase in offers when selling their property.

Energy Efficiency Upgrades: Insulation and Windows

Energy efficiency upgrades not only lower utility bills but also appeal to eco-conscious buyers. Start with insulation, which is crucial for maintaining temperature control within the home. According to the U.S. Department of Energy, proper insulation can reduce heating and cooling costs by 20% or more.

Upgrading windows to energy-efficient models can also make a significant impact. Double or triple-pane windows minimize heat loss, while low-E coatings reflect heat back into the home. Though the initial investment may seem high, the long-term savings on energy bills and increased home value often justify the cost.

DIY vs. Hiring Professionals: Making the Right Choice

Deciding whether to tackle home improvement projects yourself or hire professionals can be challenging. Consider these factors:

  • Skill level: Assess your own abilities. If a project requires specialized skills (like electrical work), it’s often best to hire a professional.
  • Time constraints: If you have limited time, hiring professionals can ensure timely completion.
  • Cost: DIY projects can save money, but be wary of potential mistakes that can lead to costly repairs.

For smaller projects, such as painting or landscaping, DIY can be rewarding and cost-effective. However, for larger renovations, investing in professionals can save time and ensure quality workmanship.

Advanced Landscaping Strategies

For homeowners looking to take their landscaping to the next level, advanced strategies can help create a stunning and sustainable outdoor environment. This section will explore permaculture principles, hardscaping, and the integration of technology.

Creating a Sustainable Garden: Permaculture Principles

Permaculture is a holistic approach to gardening and landscaping that works with nature rather than against it. The core principles of permaculture emphasize sustainability, biodiversity, and resilience. Start by observing your garden space: note the sunlight patterns, wind directions, and water availability.

Implement strategies such as:

  • Companion planting: Pairing plants that benefit each other, like tomatoes and basil, can improve growth and repel pests.
  • Mulching: Applying organic mulch retains moisture, suppresses weeds, and enriches the soil as it decomposes.
  • Rainwater harvesting: Collecting rainwater reduces water usage and provides a sustainable source for irrigation.

By incorporating these principles, you can create an eco-friendly garden that thrives while minimizing your environmental impact.

Incorporating Hardscaping: Patios, Pathways, and Walls

Hardscaping elements enhance both the functionality and aesthetics of your outdoor space. Patios provide areas for relaxation and entertainment, while pathways can guide visitors through your garden. Retaining walls can define spaces and prevent soil erosion.

When designing hardscaping features, consider materials that complement your home and garden style. For example, natural stone or brick can create a rustic look, while concrete offers a modern aesthetic. Be mindful of drainage and accessibility to ensure these structures are both practical and beautiful.

Using Technology: Smart Irrigation and Garden Management Tools

In today’s digital age, technology can significantly enhance garden management. Smart irrigation systems can automate watering schedules based on weather conditions, conserving water and ensuring plants receive adequate moisture. For instance, systems like Rachio or RainMachine allow you to control your irrigation from your smartphone.

Additionally, garden management apps can help you track plant health, growth progress, and care routines. Apps like PlantSnap can identify plants and provide care tips, making it easier for homeowners to maintain their gardens effectively.

Seasonal Home and Garden Maintenance Tips

Maintaining a home and garden requires seasonal attention to ensure longevity and beauty throughout the year. This section offers essential maintenance tips tailored to each season.

Spring Cleaning and Preparation for the Growing Season

Spring is the perfect time to refresh your home and garden. Start by decluttering living spaces and deep cleaning. In the garden, remove debris and dead plants to prepare for new growth. Conduct a soil test and amend it as necessary to ensure optimal growing conditions.

Additionally, consider starting seeds indoors or purchasing seedlings for transplanting. Spring is also an excellent time to apply pre-emergent herbicides to control weeds before they sprout.

Winterization Strategies for Home and Garden

As colder weather approaches, preparing your home and garden for winter is crucial to prevent damage. In the garden, cut back perennials and protect vulnerable plants with mulch or burlap. Drain and store garden hoses to prevent freezing.

For your home, check insulation, seal gaps around windows and doors, and ensure your heating system is functioning efficiently. These proactive steps can save on energy costs and prevent costly repairs in the spring.

Seasonal Pest Control: Prevention and Treatment Methods

Pest control is a year-round concern for homeowners. Seasonal pest management strategies can help keep unwanted invaders at bay. In the spring, focus on prevention by maintaining healthy plant conditions and employing companion planting to deter pests.

In summer, monitor for signs of infestations and treat early. Organic solutions like neem oil or insecticidal soap can be effective without harming beneficial insects. As fall approaches, take measures to prevent pests from overwintering in your home, such as sealing entry points and removing food sources.

Expert carpet fitting services West London with skilled fitter laying plush carpet in a cozy living room.

Expert Carpet Fitting Services West London: 2026 Guide to Quality Installation

The Importance of Professional Carpet Fitting Services West London

When it comes to enhancing the aesthetic and comfort of your home, the importance of high-quality carpet fitting cannot be overstated. Carpet fitting services in West London offer not just a product but a tailored solution that aligns with your style and functional needs. A properly fitted carpet can transform a room, providing warmth and a touch of elegance, while also playing a significant role in the longevity of your flooring investment. Understanding why it’s crucial to enlist professional services can help you make informed decisions that ultimately enhance your living spaces.

When exploring options, carpet fitting services West London provide comprehensive insights on quality installations and the essential considerations before making a choice.

Why Choose Professional Carpet Fitters?

Choosing professional carpet fitters comes with numerous advantages. Not only do professionals possess the necessary skills and experience, but they also have the right tools for the job. This expertise ensures that your carpet is installed correctly, helping to prevent future issues like buckling or damage. Moreover, professional fitters can advise you on the best carpet types for your specific needs, taking into account factors like durability, maintenance, and style.

Benefits of Expert Installation Techniques

Skilled carpet installers use advanced techniques that result in a flawless finish. They understand how to measure accurately and lay carpets to suit the room’s dimensions and shape. For example, proper stretching techniques can prevent premature wear and tear, and utilizing the right underlay can enhance comfort underfoot while extending carpet longevity. By opting for expert installation, homeowners can ensure that their carpets not only look great but also function optimally.

Common Mistakes in DIY Carpet Fitting

While DIY projects can be rewarding, carpet fitting is one area where improper techniques can lead to costly errors. Common mistakes include miscalculating the necessary measurements, failing to prepare the subfloor correctly, and using inadequate installation products. These errors can result in a poorly fitted carpet that may require reinstallation, negating any cost savings. Therefore, investing in professional services can often save time, money, and stress in the long run.

Understanding Carpet Fitting Costs in West London

Understanding the financial aspects of carpet fitting can help homeowners make better budgeting decisions. The costs associated with carpet installation can vary widely based on several factors, including the type of carpet, the complexity of the installation, and regional labor rates. In West London, where market dynamics fluctuate, knowing what to expect can empower consumers.

Factors Influencing Labour and Material Costs

Several key factors influence the overall costs of carpet fitting. Firstly, the quality and material of the carpet itself can significantly impact pricing. Natural fibers, such as wool, tend to be more expensive but offer luxurious comfort and durability. Secondly, the costs of labor in West London can vary based on the installer’s experience, the project’s scope, and your specific location within the city. Lastly, preparation costs—including removing existing flooring or leveling the subfloor—can also contribute to the overall expense.

Comparative Analysis: DIY vs. Professional Services

While DIY carpet fitting may appear to be a more economical choice, the long-term costs can often exceed initial savings. A professional installer brings expertise that minimizes waste and prevents damage, delivering a result that might not be achievable by a novice. Consider that professional installations often include the cost of high-quality underlays and tools, which are essential for a successful fitting.

Budgeting Tips for Carpet Fitting Projects

Creating a realistic budget is crucial when planning for carpet fitting services. Start by determining the total area to be covered and researching the costs of different carpet types and underlays. Factor in additional expenses such as installation fees, any underlay required, and other preparatory work that may be necessary. Setting aside an additional 10-15% for unforeseen costs is also a smart budgeting strategy, ensuring you’re well-prepared for any surprises.

Choosing the Right Carpet for Your Space

Selecting the appropriate carpet is critical for achieving the desired aesthetic and functionality in your home. With a myriad of options available in the market, understanding the variations can help streamline your decision-making process.

Types of Carpets: Pros and Cons

There are several types of carpets, each with its unique set of advantages and disadvantages:

  • Loop Pile: Durable and resilient, suitable for high-traffic areas but may be less soft underfoot.
  • Cut Pile: Offers softness and comfort but can be prone to wear in busy spaces.
  • Berber: Known for its durability, great for high-traffic areas, though it may show dirt more easily.
  • Shag: Extremely soft and luxurious but requires more maintenance to keep it looking fresh.

How to Select the Right Carpet Based on Lifestyle

Your lifestyle should heavily influence your carpet selection process. For instance, families with children or pets may prioritize durability and ease of cleaning, while those looking for luxury may opt for softer, high-end materials. Additionally, consider the climate and how it affects carpet maintenance and wear. For example, a home in a rainy area might benefit from synthetic fibers that resist moisture and mold.

Eco-Friendly Carpet Options Available in 2026

As sustainability becomes increasingly important, various eco-friendly carpet options are now available. Materials such as recycled polyester, natural wool, and cotton are not only environmentally friendly but also often more breathable and healthier for indoor air quality. Furthermore, many manufacturers are adopting responsible production practices, making it easier for conscious consumers to choose sustainable options without sacrificing aesthetics.

Steps Involved in Professional Carpet Installation

Understanding the process involved in professional carpet installation can help set your expectations and ensure a smooth experience. The journey from selection to installation involves several key steps.

Initial Measurements: Ensuring Accurate Fit

The first step involves accurate measurements of the room. Professional fitters will take precise dimensions to ensure the carpet fits seamlessly. This includes measuring the length and width of the area, accounting for any alcoves or unusual shapes that may require additional cuts of carpet.

Preparation: What to Expect on Installation Day

On installation day, the fitter will prepare the area by clearing the room of furniture and existing flooring. This preparation may also involve leveling the subfloor to create a smooth base for the new carpet. Depending on the type of carpet and installation method, the fitter might install a suitable underlay at this stage, further enhancing comfort and durability.

Final Touches: Post-Installation Care Tips

Once the carpet is fitted, the installer will perform a final inspection, addressing any concerns you may have. Post-installation care includes allowing the carpet to settle and vacuuming regularly to remove debris from installation. It’s advisable to avoid heavy furniture on the new carpet for a few days to allow it to acclimate effectively.

Future Trends in Carpet Fitting Services West London

The carpet fitting industry is continually evolving, with new trends emerging that reflect changes in consumer preferences, technological advances, and sustainability efforts. Understanding these trends can help homeowners stay ahead and make informed choices for their interiors.

Technological Innovations in Carpet Installation

Advancements in technology are changing the carpet fitting landscape. Innovations like laser measurement tools are enhancing accuracy, while specialized equipment allows for quicker and more efficient installations. Furthermore, online tools are now available that allow homeowners to visualize different carpet options in their spaces before committing to a purchase.

Sustainability and Eco-Conscious Practices in the Industry

Sustainability is more than a trend; it’s becoming a standard expectation in the carpet industry. Leading brands are now prioritizing eco-friendly materials and production methods. This shift is not only beneficial for the environment but also caters to a growing demographic of consumers who place a high value on sustainability.

Predictions for Carpet Styles and Preferences in 2026

As we move deeper into 2026, consumers are likely to favor carpets that offer both luxury and practicality. Expect to see a rise in demand for natural fibers, designs that integrate biophilic elements, and neutral color palettes that promote calm and serenity in living spaces. The focus will be on creating environments that reflect personal style while being functional and easy to maintain.

What Are Carpet Underlay Types and Their Impact?

The type of underlay you choose plays a significant role in the overall performance of your carpet. Different materials, such as foam, rubber, or felt, each offer unique benefits. For instance, memory foam underlays provide exceptional comfort, while rubber underlays are known for their durability and sound insulation capabilities. Selecting the right underlay not only enhances comfort but can also extend the life of your carpet.

How to Maintain Carpets for Longevity?

Maintaining your carpet is essential for ensuring its longevity. Regular vacuuming, professional cleaning every 12-18 months, and immediate attention to spills can help preserve the appearance and functionality of your flooring. Using protective treatments and ensuring proper airflow in rooms can also mitigate wear, keeping your carpet looking new for longer.

Flooring specialists near me advising a couple on flooring options in a sunny living room.

Expert Flooring Specialists Near Me: Your Complete Guide for 2026

Understanding Flooring Options Available Near You

Choosing the right flooring for your home is a significant decision. With so many options available, it can be overwhelming to navigate through various materials, styles, and functionalities. Whether you’re searching for something aesthetic, durable, or easy to maintain, understanding the distinct types of flooring available is crucial. When exploring options, flooring specialists near me provide comprehensive insights that can help guide your selection process and ensure that you make an informed choice.

Types of Flooring and Their Benefits

The flooring market offers a plethora of choices, each with unique attributes. Here are some popular flooring types you might consider:

  • Hardwood Flooring: Renowned for its timeless beauty, hardwood offers warmth and elegance. It’s durable and can be refinished over time to maintain its appearance.
  • Laminate Flooring: A cost-effective alternative that mimics the look of wood or stone, laminate is scratch-resistant and easy to clean, making it suitable for high-traffic areas.
  • Vinyl Flooring: Available in sheets, tiles, or planks, vinyl is water-resistant and affordable. Newer designs can closely imitate more expensive materials, such as hardwood or tile.
  • Tile Flooring: Perfect for bathrooms and kitchens, tile is exceptionally durable, resistant to moisture, and available in a wide variety of styles and colors.
  • Carpet: Carpet provides comfort and insulation while being available in numerous textures and colors. It’s an excellent choice for bedrooms and living spaces.

Choosing the Right Flooring for Your Needs

When selecting flooring, several factors need to be considered:

  • Functionality: Think about where the flooring will be installed and how much traffic it will endure. Areas prone to moisture, like bathrooms or kitchens, require water-resistant options.
  • Aesthetics: Your choice should complement your home’s decor. Consider the existing color scheme and furniture style.
  • Budget: Establish your budget ahead of time, as flooring costs can vary widely based on materials and installation preferences.
  • Maintenance: Some flooring types require more upkeep than others. For instance, hardwood may need refinishing, while vinyl is usually low maintenance.

Common Misconceptions About Flooring Materials

Many homeowners hold misconceptions regarding flooring materials that can lead to poor choices:

  • All hardwood floors are the same: In reality, there are various types of hardwood, each with different levels of durability, color, and grain patterns.
  • Vinyl is low quality: Modern vinyl is often high-quality, durable, and offers excellent design versatility.
  • Carpets are outdated: With advancements in technology, carpets now offer a range of modern designs and materials that are stain-resistant and sustainable.

Why Hire Professional Flooring Specialists?

The installation of flooring is not a task to be taken lightly. Partnering with flooring specialists can provide numerous advantages that ensure a successful renovation project.

Expertise in Installation and Selection

Professional flooring specialists have in-depth knowledge about various materials and can guide you in selecting the best option tailored to your needs. They understand the nuances of installation that can affect the longevity and performance of your flooring.

Time-Saving and Stress-Reducing Benefits

By hiring professionals, you eliminate the hassle of doing it yourself. They can efficiently manage scheduling, materials, and the installation timeline, allowing you to focus on other essential aspects of your home renovation.

Long-Term Value of Professional Services

Investing in professional flooring services often leads to better long-term outcomes. Quality installation can prevent future issues like warping or wear, providing you with a floor that lasts for years and maintains its value.

Local Flooring Specialists: How to Find the Best

Finding the right flooring specialist in your area is essential for a successful flooring project. Here are steps to follow:

Researching Flooring Businesses in Your Area

Start by gathering a list of local flooring specialists. Use online resources such as Yelp, Google Maps, and the Better Business Bureau to find reputable companies with positive reviews.

Evaluating Reviews and Customer Feedback

Customer feedback can provide invaluable insight into the quality of service. Look for reviews on multiple platforms to gauge overall customer satisfaction and reliability.

Questions to Ask Your Flooring Specialist

When interviewing potential flooring specialists, consider asking the following questions:

  • What types of flooring do you specialize in?
  • Can you provide references from past clients?
  • What is your installation process like?
  • Do you offer warranties on your work?

Steps for Preparing Your Home for New Flooring

Preparation is key to a successful flooring installation. Follow these steps to ensure a smooth process:

Clearing Space for Installation

Prior to installation, remove furniture and other items from the area. This will create a clear workspace for the specialists and help speed up the installation process.

Understanding the Installation Process

Educate yourself about what to expect during the installation. Knowing the timeline and steps involved can help alleviate any concerns.

Post-Installation Care for Your New Floors

Once the flooring is installed, inquire about maintenance tips from your flooring specialists. Understanding how to care for your new floors will enhance their durability and appearance over time.

Future Flooring Trends for 2026 and Beyond

The flooring industry continues to evolve, embracing innovations that cater to changing consumer preferences. Here are key trends to watch for:

Sustainable and Eco-Friendly Flooring Options

As environmental consciousness rises, sustainable flooring options such as bamboo, cork, and recycled materials are gaining popularity. These choices appeal to eco-conscious consumers without compromising style and performance.

Technological Innovations in Flooring

Smart flooring solutions are emerging, including options that integrate technology for improved functionality such as heating systems and moisture detection sensors.

Design Trends Shaping the Flooring Industry

Bold patterns, rich textures, and vibrant colors are making waves in flooring design. Homeowners are increasingly opting for unique designs that reflect their personal style and enhance their living spaces.

What Are the Best Flooring Specialists Near Me?

To find the best flooring specialists near you, consider conducting targeted searches online and asking for recommendations from friends or family. Look for companies that have a reputation for quality work and excellent customer service.

How to Compare Flooring Specialists’ Services?

When comparing services, assess factors such as pricing, material selections, customer reviews, and warranty options. This will help you make an informed decision aligned with your project goals.

When Is the Right Time to Replace My Flooring?

It’s time to consider replacing your flooring if you notice consistent wear and tear, such as visible damage, staining, or outdated styles. Flooring specialists can provide assessments that inform your decision.

Can Flooring Specialists Help with DIY Projects?

Yes, many flooring specialists offer consultation services for DIY projects. They can guide you on material selection, tools needed, and tips for a successful installation.

What Materials Do Flooring Specialists Recommend?

Specialists will typically recommend materials based on your specific needs, preferences, and lifestyle. For instance, families with pets may be directed towards durable and easy-to-clean materials.

Enhance your bathroom aesthetics with stylish shower doors sliding, featuring a sleek, modern design and elegant details.

Stylish and Functional Shower Doors Sliding for Every Bathroom Design

The Importance of Choosing the Right Shower Doors Sliding

When it comes to designing a modern bathroom, the selection of shower doors sliding plays a crucial role in both aesthetics and functionality. Not only do sliding doors provide convenience, but their integration can transform the overall vibe of your space. Choosing the right sliding shower door isn’t simply a matter of personal taste; it also affects the usability, maintenance, and accessibility of your bathroom.

Benefits of Shower Doors Sliding in Modern Bathrooms

Shower doors sliding offer several advantages that align with contemporary design trends. Their sleek, seamless appearance contributes to a sense of openness, which is particularly valuable in smaller bathrooms. Unlike traditional hinged doors, sliding doors do not require additional space to open and close, thus maintaining a clean and uncluttered visual.

Moreover, sliding doors are often more water-resistant than shower curtains, reducing the potential for water leakage. They also provide a variety of styling options—from clear glass for a sleek look to frosted glass for privacy—making them versatile for any design preference.

Common Styles of Shower Doors Sliding

The variety of styles available for shower doors sliding can cater to any bathroom aesthetic. Here are some of the prevalent styles:

  • Frameless Sliding Doors: These doors offer a minimalist look with a seamless glass design that creates an illusion of spaciousness.
  • Framed Sliding Doors: For a traditional look, framed sliders come with metal framing, providing durability and style.
  • Bi-Fold Sliding Doors: Ideal for compact spaces, bi-fold doors elegantly fold to one side for easy access.
  • Rounded Sliding Doors: Perfect for corner enclosures, these doors maintain softness in design while maximizing space.

How Shower Doors Sliding Enhance Accessibility

Accessibility in bathrooms has gained significant importance, especially in designs aimed at accommodating users of all ages and abilities. Shower doors sliding remove the need to maneuver around a swinging door, making entry and exit smoother for everyone. Additionally, many options feature low thresholds and can be fitted with grab bars, further enhancing safety for seniors or those with mobility issues.

Key Features to Consider When Selecting Shower Doors Sliding

Material Choices: Glass vs Acrylic for Shower Doors Sliding

One of the critical decisions to make when selecting shower doors sliding is the material. The two most popular options are glass and acrylic.

Glass: Glass doors are often favored for their upscale appearance and ease of cleaning. Tempered glass options are highly durable and safe; if broken, they shatter into small pieces rather than sharp shards.

Acrylic: Acrylic sliding doors are lighter than glass and often less expensive. They resist chipping and cracking but can be more prone to scratching and discoloration over time. Considering long-term maintenance and aesthetic preferences will guide your material choice.

Hardware Options: Understanding Track Systems

The track system is a vital component in the functionality of shower doors sliding. A robust track ensures smooth operation and repositioning. Various options include:

  • Top-Mounted Tracks: These tracks are hidden from view, lending a seamless look but can require ceiling support.
  • Bottom Rollers: Bottom-mounted systems often handle larger glass panels more easily but require regular cleaning to prevent debris buildup.
  • Wide Track Systems: These systems can accommodate heavier doors, providing additional stability and improved durability.

Design Elements That Complement Your Bathroom

Shower doors sliding serve as focal points in bathroom design. It’s essential to ensure they complement existing fixtures, colors, and styles. Consider factors such as:

  • Color Scheme: Neutral tones can blend well with diverse bathroom palettes, while bold frames can offer a striking contrast.
  • Texture: Frosted or patterned glass can add visual interest and privacy without sacrificing light.
  • Finishes: Select finishes that match your bathroom’s hardware, including faucets and towel bars, to create a cohesive look.

Installation Tips for Shower Doors Sliding

Preparation Steps for a Smooth Installation

Before installation, it’s crucial to prepare the environment. Start by measuring the space carefully and ensuring that the walls are level. Consider these pre-installation steps:

  • Remove any existing doors or curtains carefully to avoid damage.
  • Clean the area thoroughly to make installation easier.
  • Gather essential tools, including a drill, level, and measuring tape.

DIY vs Professional Installation: What to Choose

The installation of shower doors sliding can be handled by savvy DIYers, but insufficient knowledge can lead to errors. If you have the experience and tools, a DIY approach can save costs and offer a rewarding experience. Conversely, hiring a professional ensures a precise setup that likely comes with warranties and minimizes the risk of future issues.

Maintenance Tips for Longevity of Your Shower Doors Sliding

Once your shower doors sliding are installed, maintaining them is vital for longevity. Regular cleaning with a gentle cleanser will keep glass sparkling, while sealing any gaps with silicone prevents moisture issues. Ensure track systems are debris-free for smooth operation and check hardware for wear periodically.

Maximizing Space with Shower Doors Sliding

How Shower Doors Sliding Save Floor Space

One of the primary benefits of shower doors sliding is their ability to conserve floor space. Unlike traditional doors that swing outward, sliding doors operate along a fixed track, allowing more floor area for movement and furnishings. In compact bathrooms, this improvement is essential.

Incorporating Shower Doors Sliding in Small Bathrooms

For small bathrooms, maximizing utility without compromising style is crucial. Sliding doors can create an illusion of depth, making spaces appear larger. Opting for clear or lightly frosted glass can enhance light flow, further contributing to an airy environment.

Transforming Layouts with Custom Shower Doors Sliding

Custom shower doors sliding can revolutionize layouts. Tailoringdoor dimensions to fit unique bathroom shapes or spatial constraints allows for optimal functionality without sacrifice. Custom options also provide an avenue for personalized design elements that can further enhance your overall décor theme.

FAQs About Shower Doors Sliding

What Should I Look for When Buying Shower Doors Sliding?

When purchasing shower doors sliding, consider the size, material, track system, and design. Ensure you choose durable materials and a harmonious style that complements your bathroom decor.

Can Shower Doors Sliding Be Customized?

Yes, many manufacturers offer custom shower doors sliding to fit unique spaces or personal preferences, including size, shape, and design elements.

How Do I Maintain the Luster of My Shower Doors Sliding?

Regular cleaning with a non-abrasive cleaner is essential. Apply a protective sealant to reduce mineral deposits and prevent hard water stains.

Are Shower Doors Sliding Suitable for All Bathroom Sizes?

Shower doors sliding can be adapted to suit various bathroom sizes, but careful measuring is essential to ensure a proper fit and functionality in smaller spaces.

What Is the Average Cost of Shower Doors Sliding?

The cost of shower doors sliding varies widely based on materials, design, and installation complexity. Generally, budget for anywhere from a few hundred to several thousand pounds.